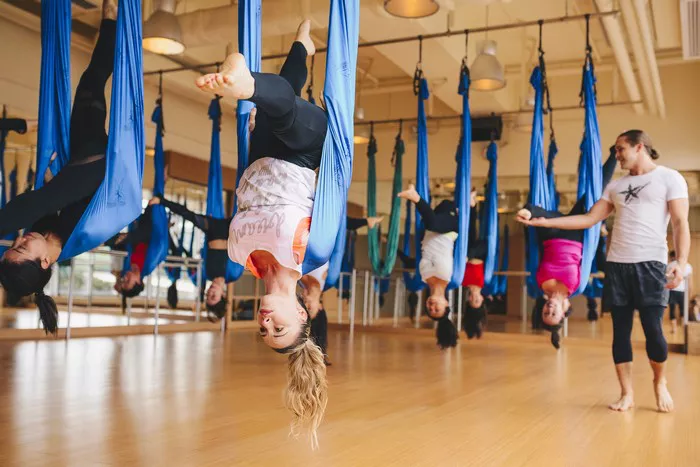
Flying yoga, also known as aerial yoga or anti-gravity yoga, is a unique and exciting form of exercise that combines traditional yoga poses with the use of a hammock or aerial silk. This innovative practice offers a full-body workout that enhances flexibility, strength, balance, and relaxation, while also providing a fun way to experience yoga from a completely different perspective—off the ground.
Although flying yoga is commonly practiced in specialized studios with aerial equipment, it’s possible to practice safely at home with some preparation and the right equipment. In this article, we will walk you through everything you need to know to begin your flying yoga journey at home, from the benefits and essential equipment to step-by-step instructions for your first practice.
What is Flying Yoga?
Flying yoga is a form of yoga that uses a hammock or aerial silk suspended from the ceiling to support your body during various yoga poses. The hammock provides support for the body, allowing you to perform yoga poses with the assistance of gravity. This unique form of yoga provides a different approach to familiar poses and creates an entirely new experience, offering deeper stretches and more dynamic movement.
Flying yoga is designed to improve strength, flexibility, and mental focus, while providing a sense of fun and freedom. The hammock helps to decompress the spine, strengthen the core, and encourage proper alignment in a way that traditional yoga poses may not. It also has benefits for those who are looking to challenge their balance and coordination, as well as improve their overall fitness.
Benefits of Flying Yoga
Before we dive into how to do flying yoga at home, it’s important to understand the many benefits that this practice can offer. Some of the key advantages include:
Increased Flexibility and Strength: Flying yoga helps improve flexibility, especially in the spine, hips, and shoulders, by using gravity-assisted stretches. It also builds core strength and stability, as the hammock provides support for more challenging poses.
Spinal Decompression: One of the most significant benefits of flying yoga is spinal decompression. By hanging upside down or in an inverted position, the hammock allows gravity to create space between your vertebrae, helping to relieve tension in the spine, improve posture, and alleviate back pain.
Improved Circulation: Inverting your body during flying yoga encourages better circulation. The inversion stimulates blood flow to the brain and heart, enhancing overall cardiovascular health.
Core Activation: The practice of flying yoga requires you to engage your core muscles in order to stabilize your body while floating in the air. This leads to stronger abdominal muscles and a more toned physique.
Stress Relief and Relaxation: Like traditional yoga, flying yoga can help reduce stress and anxiety. The meditative aspect of the practice, combined with the gentle sway of the hammock, promotes a sense of relaxation and tranquility.
Fun and Playfulness: Flying yoga offers a playful, lighthearted approach to fitness. It’s a creative and enjoyable way to challenge yourself and take your practice to new heights—literally!
Equipment Needed for Flying Yoga at Home
To practice flying yoga at home, you will need some basic equipment and tools. It’s crucial to ensure that you have the right setup for your safety and comfort.
1. Aerial Yoga Hammock (Swing)
The most important piece of equipment for flying yoga is the aerial hammock. This hammock is typically made from durable, stretchy fabric, such as nylon or polyester, and is designed to hold your body weight while you perform various yoga poses. The hammock usually comes with two main straps that allow you to adjust its height, as well as a central support point.
2. Ceiling Mounting Kit
You will need a secure ceiling mounting kit to hang your aerial hammock. The kit should include sturdy ceiling hooks or a rigging system, as well as carabiners and straps. Make sure to use high-quality, reliable hardware that can support your weight safely. The ceiling must be strong enough to hold the hammock; if in doubt, consult a professional to help with installation.
3. Yoga Mat
Though the hammock supports most of your body, it’s a good idea to have a yoga mat on the floor underneath you for added cushioning. The mat will also help you during floor stretches and when you return to the ground after inverted poses.
4. Comfortable Clothing
Wear comfortable, form-fitting clothing that allows freedom of movement. Avoid clothes with loose fabric that could get caught in the hammock. Tight-fitting yoga pants and a fitted top or tank are ideal for this type of practice.
5. Safety Measures
Flying yoga can be fun and exciting, but it is essential to prioritize safety. Before you begin, ensure that your ceiling and installation are secure, and always practice in a space free of obstacles or hazards. If you are new to flying yoga, consider using a soft mat or cushions around you for added protection.
Setting Up Your Space
Setting up a safe space for flying yoga at home is critical to your practice. Choose a room with enough ceiling height (at least 8-10 feet) to accommodate the hammock and allow for full movement. The hammock should be hung from a sturdy beam or ceiling joist capable of supporting your weight. If you don’t have a high enough ceiling or suitable support, you might want to explore alternative ways to practice or consider visiting a studio.
It’s essential to ensure that the area around the hammock is clear of furniture or obstacles that could interfere with your movements. Ensure that there’s enough room to move freely in all directions.
How to Do Flying Yoga at Home: Step-by-Step Guide
Now that you have your equipment and space ready, let’s walk through the basic steps to practice flying yoga safely and effectively. If you are new to aerial yoga, it’s best to start with beginner-friendly poses and gradually build up your confidence and strength.
1. Warm Up
As with any form of exercise, it’s important to begin with a warm-up. This helps prepare your muscles, joints, and mind for the movements ahead. A 5-10 minute warm-up with gentle stretches and breathing exercises will help you ease into the practice.
2. Getting into the Hammock
Adjust the hammock: Start by adjusting the height of the hammock. The seat of the hammock should be at a height where you can easily sit on it and place your feet flat on the floor. The hammock should also allow you to fully extend your arms overhead when you are hanging in an inverted position.
Position your body: To get into the hammock, carefully hold the fabric with both hands, step into the hammock with one foot, and then place your other foot in. Slowly lower your body into a seated position, with the hammock supporting your hips and thighs. At first, you may want to start by practicing simple seated poses to get used to the sensation of being suspended.
3. Basic Flying Yoga Poses
Seated Pose (Sukhasana): Start by sitting in the hammock with your legs crossed or extended in front of you. Keep your back straight and relax your shoulders. Engage your core and breathe deeply to maintain balance and focus. This pose helps you develop a sense of stability in the hammock.
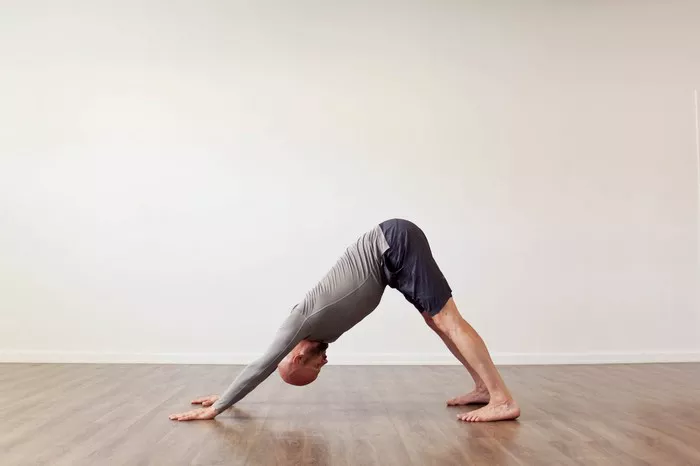
Inverted V Pose (Downward-Facing Dog): From a seated position, extend your legs and place them on the fabric. Lift your hips and straighten your arms as you come into an inverted V position, resembling the traditional downward-facing dog pose. The hammock supports your torso, allowing you to experience a deeper stretch in your legs and back.
Flying Forward Fold: From the inverted V position, slowly walk your feet forward and bend your knees as you fold forward. The hammock will support your upper body, creating a deep stretch in the hamstrings and lower back.
Cobra Pose: Start by lying on your stomach in the hammock, with your chest supported by the fabric. Place your hands on the ground and gently lift your upper body into a cobra pose, stretching your spine and chest. This pose helps strengthen the back and open up the chest.
Inverted Resting Pose: For a relaxing and restorative experience, try hanging upside down in the hammock with your legs supported by the fabric. Let your arms and head dangle freely as you focus on deep breathing and relaxation. This is a great pose to decompress your spine and relieve tension in the neck and shoulders.
4. Breathing and Focus
Throughout your practice, remember to focus on your breath. Use slow, controlled breathing to help stabilize your body and maintain balance. As you engage in different poses, deepen your breath to release tension and increase your body’s flexibility. A calm, focused mind is key to fully benefiting from flying yoga.
5. Cool Down
At the end of your session, take some time to cool down and relax your body. Gentle stretching and a few minutes of deep breathing can help you relax and bring your practice to a close. You may also choose to meditate for a few minutes in the hammock to promote relaxation and mindfulness.
Conclusion
Flying yoga is an exhilarating and rewarding practice that combines the benefits of yoga with the thrill of being suspended in the air. By following the steps outlined in this article, you can safely practice flying yoga at home and enjoy its many benefits, including increased flexibility, strength, spinal decompression, and stress relief.
With the right equipment, space, and mindfulness, flying yoga can become an empowering and enjoyable addition to your fitness routine. Take your time, start with beginner poses, and always prioritize safety and proper form. As you progress in your practice, you’ll likely find that flying yoga becomes a fun, exciting, and deeply fulfilling way to explore your body’s potential and embrace new challenges.
Related Topics: