Back pain is a common ailment that affects millions of people worldwide. Whether due to prolonged sitting, poor posture, or physical strain, the discomfort can significantly impact daily life. Yoga, with its emphasis on stretching, strengthening, and alignment, offers a natural and effective way to alleviate back pain. In this article, we explore the seven best sitting yoga poses to relieve back pain and promote a healthier spine.
1. Seated Forward Bend (Paschimottanasana)
The Seated Forward Bend is a classic yoga pose that stretches the entire back, from the lower back to the upper spine. This pose helps in lengthening the spine, releasing tension, and improving flexibility.
How to Perform Paschimottanasana:
- Sit on the floor with your legs extended straight in front of you.
- Flex your feet, pressing the heels into the ground.
- Inhale, lengthening the spine and lifting your arms overhead.
- Exhale and hinge at the hips, reaching your hands towards your feet.
- Keep your back as straight as possible, avoiding rounding the spine.
- Hold the pose for 30 seconds to 1 minute, breathing deeply.
Benefits:
- Stretches the entire back and hamstrings.
- Relieves tension and tightness in the lower back.
- Improves overall spinal flexibility.
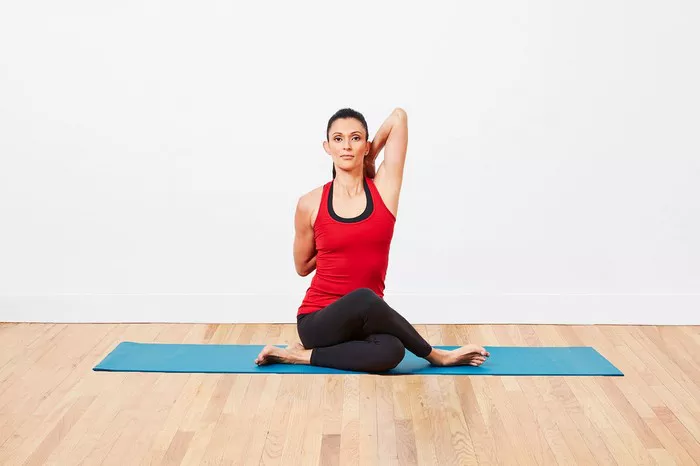
2. Seated Spinal Twist (Ardha Matsyendrasana)
The Seated Spinal Twist is excellent for relieving lower back pain and enhancing spinal mobility. This pose gently stretches the back muscles and encourages proper alignment of the spine.
How to Perform Ardha Matsyendrasana:
- Sit on the floor with your legs extended.
- Bend your right knee and place your right foot on the outside of your left thigh.
Bend your left knee and tuck your left foot under your right hip. - Inhale and lengthen your spine.
- Exhale and twist to the right, placing your right hand behind you and your left elbow on the outside of your right knee.
- Hold the pose for 30 seconds to 1 minute, then switch sides.
Benefits:
- Increases spinal mobility and flexibility.
- Alleviates lower back pain.
- Promotes detoxification through the twisting motion.
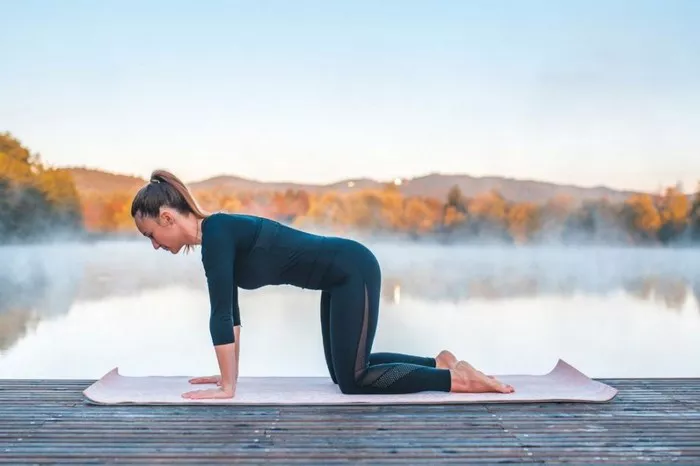
3. Cat-Cow Pose (Marjaryasana-Bitilasana)
The Cat-Cow Pose is a dynamic movement that stretches and strengthens the spine. This sequence is perfect for warming up the back muscles and improving spinal flexibility.
How to Perform Marjaryasana-Bitilasana:
- Begin on your hands and knees in a tabletop position.
- Inhale, arch your back, and lift your head and tailbone towards the ceiling (Cow Pose).
- Exhale, round your spine, tucking your chin to your chest and your tailbone under (Cat Pose).
- Continue to alternate between Cat and Cow poses, synchronizing with your breath.
- Repeat for 1 to 2 minutes.
Benefits:
- Enhances spinal flexibility and mobility.
- Stretches the back muscles and relieves tension.
- Improves coordination and breathing.
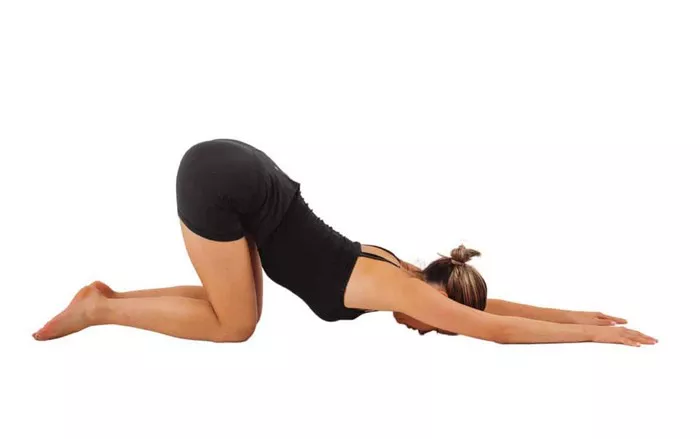
4. Child’s Pose (Balasana)
Child’s Pose is a gentle resting pose that provides a deep stretch to the lower back. It’s an excellent way to relax the spine and release built-up tension.
How to Perform Balasana:
- Begin on your hands and knees in a tabletop position.
- Sit back on your heels and lower your forehead to the floor.
- Extend your arms in front of you or alongside your body.
- Hold the pose for 1 to 2 minutes, breathing deeply.
Benefits:
- Stretches the lower back and hips.
- Promotes relaxation and stress relief.
- Gently stretches the spine and shoulders.
5. Seated Side Bend (Parsva Sukhasana)
The Seated Side Bend is effective in stretching the muscles along the sides of the torso and the spine. This pose helps in relieving tension in the lower back and improving overall flexibility.
How to Perform Parsva Sukhasana:
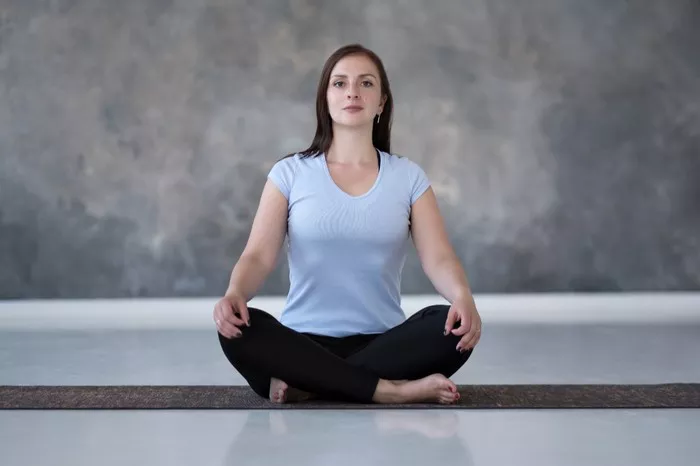
- Sit comfortably in a cross-legged position (Sukhasana).
- Place your left hand on the floor beside you.
- Inhale, lift your right arm overhead.
- Exhale, lean to the left, stretching the right side of your body.
- Hold the pose for 30 seconds to 1 minute, then switch sides.
Benefits:
- Stretches the oblique muscles and the sides of the torso.
- Relieves tension in the lower back.
- Improves flexibility and range of motion in the spine.
6. Reclined Pigeon Pose (Supta Kapotasana)
The Reclined Pigeon Pose is a restorative pose that targets the hip flexors and lower back. This pose helps to release deep-seated tension in the hips and lower spine.
How to Perform Supta Kapotasana:
- Lie on your back with your knees bent and feet flat on the floor.
- Cross your right ankle over your left knee, creating a figure-four shape.
- Reach your hands through the gap and clasp behind your left thigh.
- Gently pull your left thigh towards your chest, keeping your head and shoulders relaxed.
- Hold the pose for 1 to 2 minutes, then switch sides.
Benefits:
- Stretches the hip flexors and lower back.
- Relieves tension and tightness in the hips.
- Promotes relaxation and deep stretching.
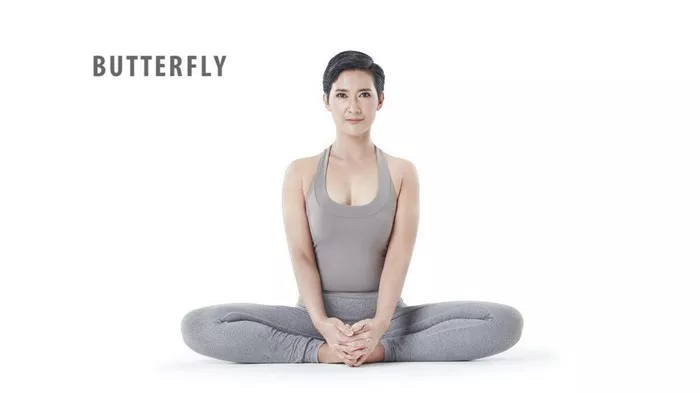
7. Butterfly Pose (Baddha Konasana)
The Butterfly Pose is an excellent pose for stretching the lower back, inner thighs, and hips. It helps in opening the hips and relieving tension in the lower back area.
How to Perform Baddha Konasana:
- Sit on the floor with your legs extended.
- Bend your knees and bring the soles of your feet together.
- Allow your knees to drop to the sides.
- Hold your feet with your hands and gently press your knees towards the floor.
- Hold the pose for 1 to 2 minutes, breathing deeply.
Benefits:
- Stretches the lower back and hips.
- Opens the inner thighs and groin.
- Improves flexibility and circulation in the lower body.
Integrating Seated Yoga Poses into Your Routine
To achieve the best results, it’s essential to integrate these seated yoga poses into your daily routine. Here are some tips to help you get started:
See Also: A Guide to the Top 10 Complex Yoga Poses
1. Warm-Up:
Always start your yoga practice with a gentle warm-up to prepare your muscles and joints. This can include gentle stretches and movements to increase blood flow and flexibility.
2. Consistency:
Practice these poses regularly to experience lasting benefits. Aim for at least three to four times a week, or even daily if possible.
3. Mindful Breathing:
Focus on your breath as you move through each pose. Deep, mindful breathing helps in releasing tension and enhancing the effectiveness of the stretches.
4. Listen to Your Body:
Pay attention to how your body feels during each pose. Avoid pushing yourself too hard and modify poses as needed to suit your comfort level.
5. Relaxation:
End your practice with a relaxation pose, such as Savasana (Corpse Pose), to allow your body to absorb the benefits of the practice and to promote overall relaxation.
Conclusion
Back pain can be debilitating, but with the right approach, you can manage and even alleviate it. These seven sitting yoga poses offer a comprehensive way to stretch, strengthen, and relieve tension in your back. By integrating these poses into your regular yoga practice, you can promote a healthier, more flexible spine and reduce the discomfort associated with back pain. Remember to practice mindfully, listen to your body, and enjoy the journey towards a pain-free back.
Related topcis:

