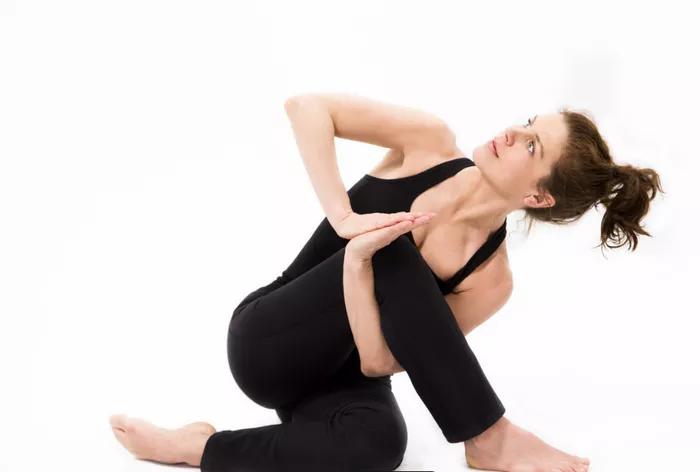
Back pain is one of the most common physical complaints affecting millions of people worldwide. Whether it’s caused by poor posture, muscle strain, or a more serious underlying condition, back pain can be debilitating and interfere with daily activities. Yoga, however, has long been hailed as an effective remedy for back pain. It can help stretch and strengthen the muscles that support the spine, improve posture, and promote relaxation.
In this article, we will explore the 10 best yoga poses that can help alleviate back pain. These poses are simple to practice and can be modified to suit different levels of flexibility and strength. By incorporating them into your daily routine, you can experience relief and prevent future episodes of back pain.
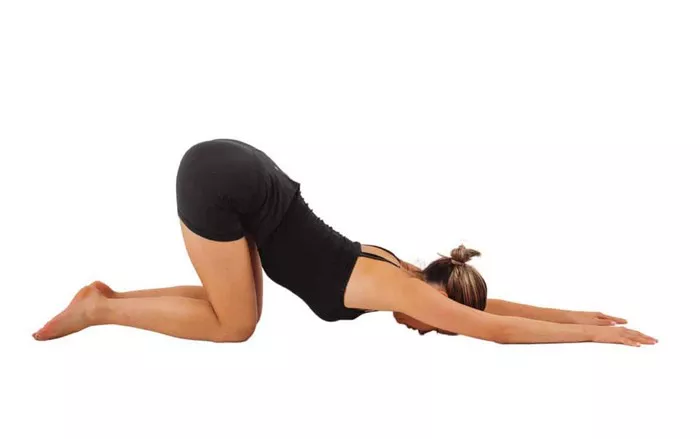
1. Child’s Pose (Balasana)
Benefits for Back Pain: Child’s Pose is a gentle stretch that helps elongate the spine, relaxes the muscles of the lower back, and relieves tension. It also promotes a sense of calm and can help release stress, which is often a contributing factor to chronic pain.
How to Do It:
- Begin on your hands and knees in a tabletop position, with your wrists aligned under your shoulders and your knees under your hips.
- Slowly lower your hips back towards your heels while extending your arms forward on the mat.
- Rest your forehead on the floor, allowing your back to round gently.
- Breathe deeply and hold the position for 30 seconds to 1 minute.
Modification: If your hips do not reach your heels, place a cushion or block under your hips for support. You can also keep your knees wider apart to make the stretch more comfortable.
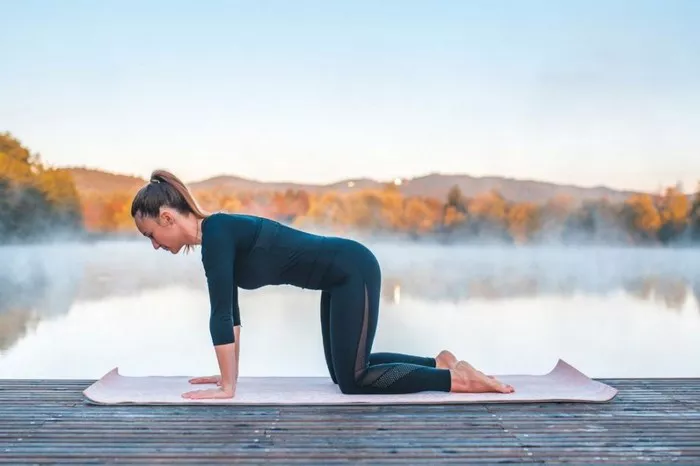
2. Cat-Cow Pose (Marjaryasana-Bitilasana)
Benefits for Back Pain: Cat-Cow Pose is a dynamic flow that helps increase flexibility and mobility in the spine. It also strengthens the muscles of the back and abdomen, which are essential for supporting the spine and preventing back pain.
How to Do It:
- Begin in a tabletop position with your hands directly under your shoulders and your knees directly under your hips.
- On an inhale, drop your belly towards the mat, arch your back, and look upward (Cow Pose).
- On an exhale, round your spine towards the ceiling, tucking your chin toward your chest (Cat Pose).
- Repeat this flow for 1-2 minutes, moving with your breath.
Modification: If you have neck pain, keep your head in line with your spine throughout the movement, or gently keep your gaze towards the floor.
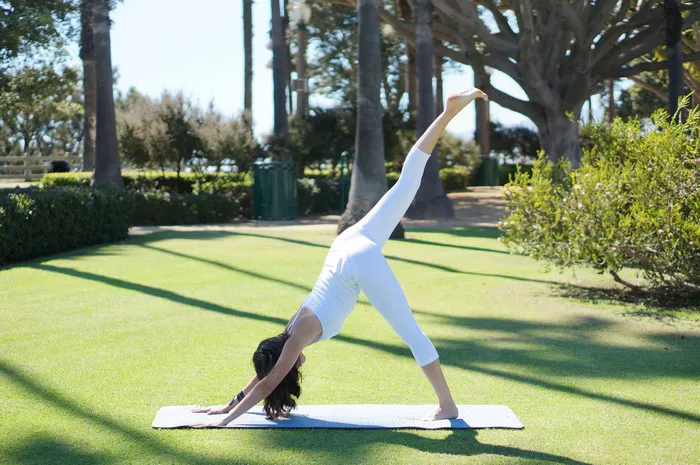
3. Downward-Facing Dog (Adho Mukha Svanasana)
Benefits for Back Pain: Downward-Facing Dog is an excellent pose for stretching the back, hamstrings, and calves. It helps lengthen the spine and relieve tension in the lower back while also strengthening the arms and shoulders.
How to Do It:
- Start in a tabletop position with your hands under your shoulders and your knees under your hips.
- Tuck your toes and slowly raise your hips toward the ceiling, aiming to form an inverted “V” shape with your body.
- Keep your hands shoulder-width apart and your feet hip-width apart, ensuring your weight is evenly distributed.
- Hold for 30 seconds to 1 minute, and then lower your knees to the mat to rest.
Modification: If your hamstrings are tight, you can bend your knees slightly to take the pressure off your lower back. You can also keep your heels lifted off the floor if necessary.
4. Cobra Pose (Bhujangasana)
Benefits for Back Pain: Cobra Pose helps strengthen the muscles of the lower back and stretches the chest and shoulders. It can be especially beneficial for individuals who suffer from poor posture or spend long hours sitting, as it opens the chest and lengthens the spine.
How to Do It:
- Begin by lying on your stomach with your legs extended and the tops of your feet pressing into the mat.
- Place your hands under your shoulders with your elbows tucked in towards your body.
- On an inhale, press into your hands to lift your chest off the mat, straightening your arms as much as possible without forcing the stretch.
- Keep your elbows slightly bent and your shoulders relaxed away from your ears.
- Hold for 15-30 seconds and lower back down.
Modification: If you feel discomfort in your lower back, perform a gentler version by keeping your elbows bent and lifting only halfway.
5. Bridge Pose (Setu Bandhasana)
Benefits for Back Pain: Bridge Pose is a great way to strengthen the glutes, hamstrings, and lower back muscles. It also opens the chest and stretches the hip flexors, which are often tight in individuals who experience lower back pain.
How to Do It:
- Lie on your back with your knees bent and your feet flat on the mat, hip-width apart.
- Press your feet into the mat as you lift your hips toward the ceiling, squeezing your glutes and engaging your core.
- Keep your shoulders and arms relaxed on the floor.
- Hold the pose for 30 seconds to 1 minute, breathing deeply.
- Slowly lower your hips back down to the mat.
Modification: If you have neck issues, place a cushion under your head for extra support. You can also hold the position for a shorter duration if it feels challenging.
6. Sphinx Pose (Salamba Bhujangasana)
Benefits for Back Pain: Sphinx Pose is a gentle backbend that helps strengthen the lower back and promotes spinal flexibility. It can be especially helpful for individuals with lower back pain as it provides a mild stretch without overloading the spine.
How to Do It:
- Lie on your stomach with your elbows directly under your shoulders, keeping your forearms on the mat.
- Press your forearms down and gently lift your chest off the floor.
- Keep your elbows bent and your chest open, while drawing your shoulder blades down your back.
- Hold for 30 seconds to 1 minute, breathing deeply.
Modification: If the full pose feels too intense, you can keep your chest closer to the mat, gradually increasing the height as you build strength.
7. Seated Forward Fold (Paschimottanasana)
Benefits for Back Pain: Seated Forward Fold provides a deep stretch to the hamstrings and lower back. By lengthening the spine and stretching the muscles along the back of the legs, it can help release tension in the lower back and improve flexibility.
How to Do It:
- Sit on the floor with your legs extended straight in front of you.
- Inhale to lengthen your spine, and on the exhale, hinge at your hips and reach your hands towards your feet.
- Keep your back straight and avoid rounding your spine excessively.
- Hold the position for 30 seconds to 1 minute, breathing deeply.
Modification: If you have tight hamstrings, you can bend your knees slightly or use a yoga strap around the feet to assist with the stretch.
8. Pigeon Pose (Eka Pada Rajakapotasana)
Benefits for Back Pain: Pigeon Pose helps open the hips and stretch the hip flexors, which can contribute to lower back pain when tight. By releasing tension in the hips and groin, it allows for better alignment of the pelvis and spine.
How to Do It:
- Start in a tabletop position and bring your right knee forward, placing it behind your right wrist while extending your left leg straight back.
- Lower your hips towards the floor, keeping both hips square to the mat.
- Extend your arms forward and lower your chest towards the mat.
- Hold the position for 30 seconds to 1 minute, then switch sides.
Modification: If your hips are high off the floor, place a cushion or block under your hips for added support. You can also practice this pose with your back leg bent for less intensity.
9. Reclining Spinal Twist (Supta Matsyendrasana)
Benefits for Back Pain: Reclining Spinal Twist is a restorative pose that helps increase mobility in the spine while gently stretching the muscles of the lower back. It also improves circulation to the spine and promotes relaxation.
How to Do It:
- Lie on your back with your knees bent and feet flat on the floor.
- Extend your arms out to the sides, keeping your shoulders on the floor.
- Drop your knees to the right side, keeping them together, while turning your head to the left.
- Hold for 30 seconds to 1 minute, then switch sides.
Modification: If you feel any discomfort in your neck or lower back, support your knees with a cushion or blanket.
10. Standing Forward Fold (Uttanasana)
Benefits for Back Pain: Standing Forward Fold provides a deep stretch to the back, hamstrings, and calves. It can help release tension in the spine and improve flexibility in the lower body, which supports the back.
How to Do It:
- Stand with your feet hip-width apart and your knees slightly bent.
- Inhale to lengthen your spine, and as you exhale, hinge forward at your hips, bringing your torso toward your thighs.
- Let your head and neck relax, and try to bring your palms to the floor or your ankles.
- Hold for 30 seconds to 1 minute, then slowly rise back up.
Modification: If you have tight hamstrings, bend your knees more deeply to avoid straining your lower back.
Conclusion
Yoga offers a holistic approach to relieving back pain by combining stretches, strengthening exercises, and mindful breathing. The 10 poses outlined in this article can help alleviate tension in the back, increase flexibility, and build strength in the muscles that support the spine. Whether you are recovering from an injury or seeking to prevent future discomfort, practicing these poses regularly can bring long-lasting relief and improve your overall quality of life.
Remember to listen to your body and move slowly into each pose. If you have severe or chronic back pain, consult with a healthcare professional before starting a new exercise routine to ensure that these poses are suitable for your condition. By incorporating yoga into your daily practice, you can create a balanced, pain-free back and improve your overall well-being.
Related Topics:


