A pinched nerve in the lower back can be an extremely uncomfortable and debilitating condition. It often causes pain, numbness, tingling sensations, and can even limit our mobility and daily activities. While medical treatment is crucial in many cases, incorporating specific yoga poses into your routine can play a significant role in relieving the symptoms and promoting the healing process. In this article, we’ll explore how yoga can be beneficial for a pinched nerve in the lower back, which poses are most effective, and how to practice them safely.
Understanding a Pinched Nerve in the Lower Back
A pinched nerve, also known as nerve compression, occurs when excessive pressure is placed on a nerve by surrounding tissues such as bones, muscles, tendons, or cartilage. In the lower back, common causes include herniated discs, spinal stenosis, muscle spasms, or poor posture over an extended period. When a nerve is pinched, it can disrupt the normal transmission of signals between the body and the brain, resulting in the unpleasant symptoms mentioned earlier.
The Role of Yoga in Relieving a Pinched Nerve
Yoga can offer several benefits for those dealing with a pinched nerve in the lower back. Firstly, it helps to improve flexibility. Many yoga poses gently stretch the muscles and soft tissues around the spine, creating more space for the nerves and reducing the pressure on them. Secondly, yoga focuses on strengthening the core muscles. A strong core provides better support to the spine, helping to maintain its proper alignment and taking some of the load off the affected nerve. Additionally, the deep breathing techniques associated with yoga can relax the body and mind, reducing muscle tension that might be contributing to the nerve compression.
Specific Yoga Poses for a Pinched Nerve in the Lower Back
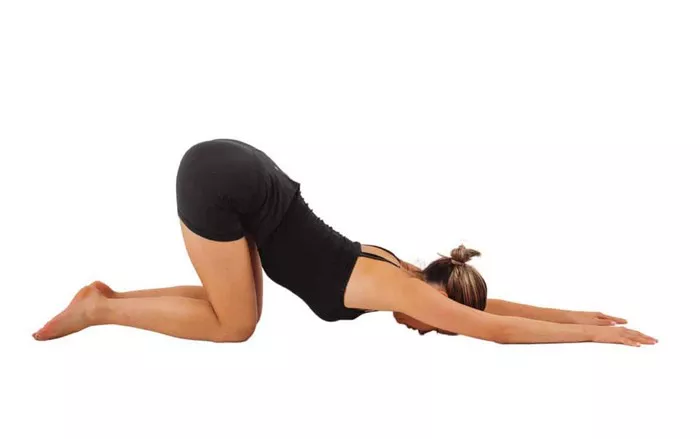
Child’s Pose (Balasana)
How to do it: Start on your hands and knees in a tabletop position. Slowly lower your hips back towards your heels while stretching your arms out in front of you, palms flat on the floor. Rest your forehead on the mat.
Benefits: This pose gently stretches the lower back muscles, hips, and thighs. It helps to relieve tension in the lumbar region and can create a bit of decompression for the pinched nerve. It also promotes relaxation, which is essential for reducing overall muscle tightness that may be exacerbating the nerve issue.
Precautions: If you have knee problems, you can place a folded blanket or a cushion under your knees for added comfort. Make sure not to force your hips too close to your heels if it causes pain or discomfort.
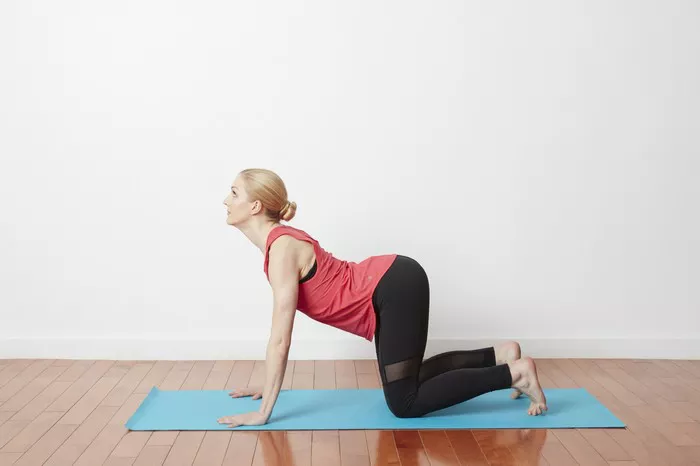
Cat-Cow Pose (Marjaryasana-Bitilasana)
How to do it: Begin in the tabletop position again. For the Cow Pose, inhale and arch your back, dropping your belly towards the floor and looking up slightly. Then, for the Cat Pose, exhale and round your spine upwards like a cat stretching, tucking your chin towards your chest.
Benefits: The alternating movement of these poses helps to mobilize the spine, increasing its flexibility. It massages the muscles along the spine, including those in the lower back, which can relieve pressure on the pinched nerve. The focus on breath also helps to relax the body as you move through the poses.
Precautions: Keep the movements slow and controlled. Avoid jerking or overextending your spine. If you feel any sharp pain during the movement, stop immediately.
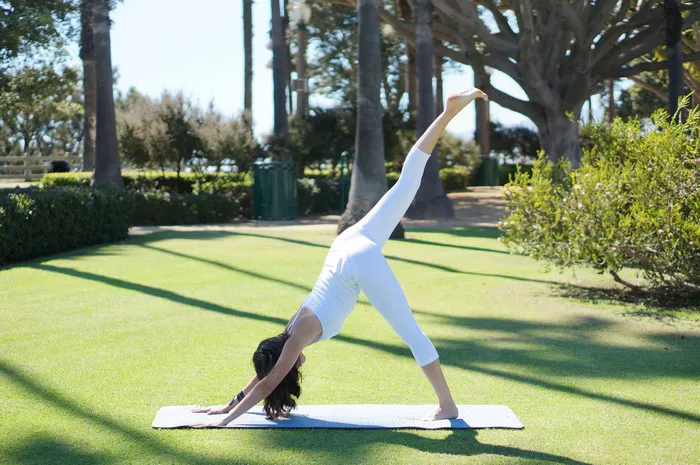
Downward-Facing Dog Pose (Adho Mukha Svanasana)
How to do it: Place your hands on the floor, shoulder-width apart, fingers pointing forward. Your feet should be hip-width apart. Lift your hips up, forming an inverted “V” shape with your body. Keep your legs as straight as possible while still maintaining comfort, and press your heels towards the floor.
Benefits: This pose stretches the hamstrings, calves, and the muscles of the lower back. By lengthening these muscles, it can relieve some of the compression on the nerve in the lower back. It also improves blood circulation in the body, which aids in the healing process.
Precautions: If you have tight hamstrings, you may not be able to straighten your legs fully, and that’s okay. Bend your knees slightly to avoid overstretching. Also, don’t let your back sag or round too much; try to keep it elongated.
Standing Forward Bend (Uttanasana)
How to do it: Stand with your feet hip-width apart. Inhale and raise your arms overhead. Exhale and hinge forward from your hips, keeping your spine long. Reach your hands towards the floor, either placing them on the ground or on your shins or ankles, depending on your flexibility.
Benefits: It stretches the back of the legs and the lower back muscles, helping to release tension and create more space around the nerve. The forward fold also encourages relaxation and can relieve stress that might be contributing to muscle tightness in the lower back.
Precautions: If you have lower back issues or a herniated disc, be cautious and bend your knees slightly to avoid putting excessive strain on the lower back. Don’t force your hands to reach the floor if it causes pain.
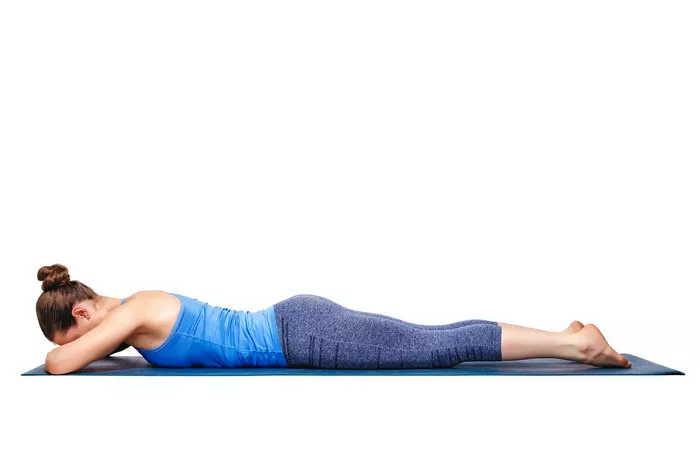
Sphinx Pose (Salamba Bhujangasana)
How to do it: Lie face down on your mat with your legs extended and the tops of your feet on the floor. Place your elbows directly under your shoulders and rest your forearms on the floor. Press into your forearms and lift your chest off the floor, keeping your pelvis and legs grounded.
Benefits: This pose gently opens up the front of the spine, particularly in the lower back area. It helps to relieve pressure on the nerve by stretching the muscles and fascia in that region. It also strengthens the muscles that support the spine.
Precautions: Avoid overarching your back. Keep the movement focused in the upper part of your back and shoulders. If you feel any discomfort in your lower back, lower your chest back down to the floor.
Bridge Pose (Setu Bandha Sarvangasana)
How to do it: Lie on your back with your knees bent and feet flat on the floor, hip-width apart. Place your arms by your sides, palms down. Press into your feet and lift your hips off the floor, creating a bridge shape. You can interlace your fingers beneath your hips for added support.
Benefits: Bridge Pose strengthens the glutes, hamstrings, and the muscles of the lower back. By engaging these muscles, it provides better support to the spine and can help relieve pressure on the pinched nerve. It also opens up the front of the body, including the hips and abdomen.
Precautions: Don’t push your hips too high as it can strain your neck. Keep your neck in a neutral position and focus on the lift from your legs and glutes. If you have any knee problems, make sure to engage your thigh muscles properly to protect the knees.
Reclining Twist Pose (Jathara Parivartanasana)
How to do it: Lie on your back with your knees bent and feet flat on the floor. Extend your arms out to the sides, palms down. Slowly lower your knees to one side, keeping your shoulders on the floor, and turn your head to the opposite side. Hold for a few breaths and then repeat on the other side.
Benefits: This pose gently twists the spine, which helps to massage the internal organs and relieve tension in the lower back muscles. The twist can also create more space around the nerve by realigning the vertebrae and reducing muscle tightness.
Precautions: Keep the movement gentle and slow. Don’t force your knees all the way down if it causes discomfort. If you have any spinal injuries or conditions, consult your doctor before attempting this pose.
Incorporating Yoga Poses into a Practice Routine
To effectively use yoga for a pinched nerve in the lower back, it’s important to create a consistent practice routine. Here’s an example of how you can structure a session:
Warm-Up
Start with a few minutes of gentle breathing exercises, such as deep belly breathing. This helps to relax the body and prepare it for movement.
Then, do a couple of rounds of the Cat-Cow Pose to warm up the spine and loosen the muscles in the lower back.
Main Poses
Perform Child’s Pose for 3 – 5 minutes, focusing on relaxing the lower back and hips.
Move on to Standing Forward Bend, holding each side for 3 – 5 breaths.
Do Downward-Facing Dog Pose for 5 – 8 breaths, feeling the stretch in the back of the legs and lower back.
Next, practice Sphinx Pose for 3 – 5 breaths, gently opening up the lower back.
Follow with Bridge Pose, holding for 3 – 5 breaths, strengthening the muscles that support the spine.
Finish with Reclining Twist Pose, spending 3 – 5 breaths on each side, gently massaging the lower back.
Cool-Down
End the session with a few minutes of relaxation in Savasana (Corpse Pose). Lie flat on your back, arms by your sides, and close your eyes. Focus on relaxing each part of your body, allowing the benefits of the practice to integrate.
Remember, it’s essential to listen to your body. If a pose causes excessive pain or discomfort, modify it or skip it altogether. You can also repeat this routine 2 – 3 times a week, gradually increasing the duration and intensity as your body adjusts.
Precautions and Considerations
Consult Your Doctor
Before starting a yoga practice for a pinched nerve in the lower back, it’s crucial to consult your doctor or a healthcare professional, especially if you have a pre-existing medical condition, such as a herniated disc, spinal stenosis, or a history of back surgeries. They can provide guidance on whether yoga is appropriate for you and if any specific precautions need to be taken.
Work with a Qualified Yoga Instructor
If possible, work with a yoga instructor who has experience dealing with back issues. They can help you with proper alignment in the poses, suggest modifications based on your individual needs, and ensure that you are practicing safely.
Progress Gradually
Don’t try to push yourself too hard too quickly. Start with simpler poses and gradually increase the complexity and duration of your practice. This allows your body to adapt and build strength and flexibility over time.
Pay Attention to Your Body’s Signals
Your body will tell you if a pose is too much for it. If you experience sharp pain, increased numbness, or any other unusual sensations during a yoga pose, come out of the pose immediately. It’s better to err on the side of caution to avoid further aggravating the pinched nerve.
Conclusion
Yoga poses can be a valuable addition to the treatment and management of a pinched nerve in the lower back. By incorporating the right poses into your routine, focusing on proper alignment and breathing, and taking necessary precautions, you can work towards relieving the symptoms and improving your overall quality of life. However, it’s important to remember that yoga should be used in conjunction with medical advice and treatment. So, are you ready to explore the potential of yoga in alleviating your lower back nerve issue?
Related topics


