Yoga is a versatile practice that can be adapted to various levels of physical ability and limitations. For those who may have difficulty with traditional floor-based poses or are recovering from an injury, chair-assisted yoga offers a wonderful alternative. The chair provides stability and support, allowing individuals to experience the benefits of yoga postures in a more accessible way. In this article, we will explore a variety of yoga poses that can be effectively performed with the assistance of a chair, along with detailed instructions on how to execute them safely and correctly.
Understanding the Benefits of Chair-Assisted Yoga
Increased Accessibility
Chair-assisted yoga makes the practice accessible to a wider range of people, including the elderly, those with limited mobility, and individuals recovering from surgeries or injuries. The chair serves as a prop that helps to balance and support the body, reducing the risk of falls and making it easier to get in and out of poses. This allows individuals who might otherwise be unable to participate in yoga to enjoy its physical and mental benefits.
Improved Posture and Alignment
Using a chair can assist in achieving better posture and alignment in certain poses. It provides a fixed point of reference, helping practitioners to understand and correct their body position. For example, in seated poses, the chair can ensure that the spine is straight and the hips are properly aligned, which is essential for preventing back pain and promoting overall spinal health.
Enhanced Muscle Engagement and Strengthening
Even with the support of a chair, many poses still require the engagement of various muscle groups. Chair-assisted yoga can help to target and strengthen specific muscles, such as the legs, core, and arms. By working against the resistance of the chair or using it for balance, practitioners can build strength and stability in a controlled and safe environment.
Chair-Assisted Standing Poses
Chair Warrior I
Setup: Stand facing the back of a sturdy chair. Place your hands on the back of the chair for support. Step your right foot back about one leg’s length, and turn your right foot out at a 90-degree angle.
Execution: Bend your left knee, making sure it is directly over your ankle, and lower your hips until your left thigh is parallel to the floor. Your right leg should be straight, with the foot firmly planted on the ground. Engage your core and feel the stretch in your right hip and the strength in your left leg. Hold the pose for 30 seconds to 1 minute, then switch sides. This pose helps to build leg strength and improve balance, while the chair provides added stability.
Chair Tree Pose
Setup: Stand next to the chair, with your right hand resting on the back of the chair for support. Lift your left foot and place the sole on the inner thigh of your right leg, just above or below the knee.
Execution: Find your balance and center yourself. You can either keep your left hand by your side or reach it up towards the ceiling. Focus on grounding through your right foot and engaging your core. Hold the pose for 20 to 30 seconds, then repeat on the other side. The chair offers stability, allowing you to work on your balance and concentration, while also stretching the hips and legs.
Chair-Assisted Seated Poses
Chair Forward Fold
Setup: Sit on the edge of the chair with your feet flat on the floor, hip-width apart.
Execution: Slowly hinge forward at the hips, reaching your hands towards the floor. If you can’t reach the floor, you can rest your hands on your shins or use a strap to extend your reach. Keep your back straight and relax your neck and shoulders. Hold the pose for 1 to 2 minutes, feeling the stretch in your hamstrings and lower back. This pose helps to relieve tension in the back and legs and is a great way to start or end a chair-assisted yoga session.
Chair Twist
Setup: Sit in the middle of the chair with your feet flat on the floor. Place your right hand on the outside of your left knee.
Execution: Twist your torso to the left, using your right hand to deepen the twist. You can look over your left shoulder for an added stretch. Hold the pose for 15 to 30 seconds, then repeat on the other side. Chair twists help to improve spinal mobility and relieve tension in the back and abdomen.
Chair-Assisted Inversions and Backbends
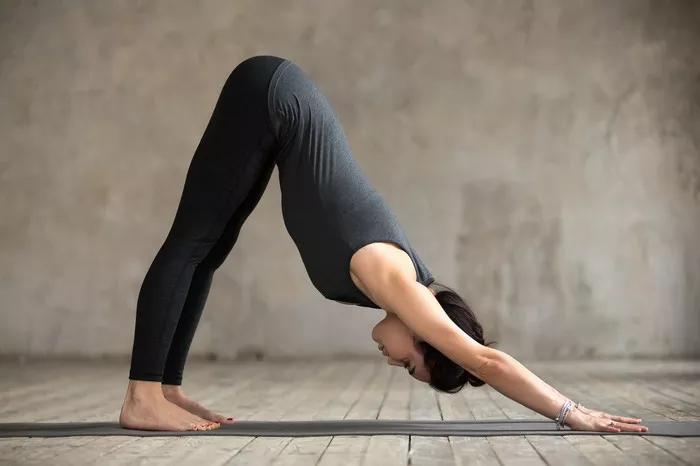
Chair Downward-Facing Dog
Setup: Place the chair against a wall for added stability. Stand facing the chair and place your hands on the seat of the chair.
Execution: Walk your feet back until your body forms an inverted “V” shape, similar to the traditional Downward-Facing Dog pose. Your hands should be shoulder-width apart, and your feet should be hip-width apart. Press your heels down towards the floor and engage your core. Hold the pose for 30 seconds to 1 minute, feeling the stretch in your shoulders, back, and legs. This modified version of the pose is less intense but still provides many of the benefits, such as improved flexibility and strength.
Chair Bridge Pose
Setup: Lie on your back on the floor, with your legs bent and your feet flat on the floor. Place the chair behind you, close enough so that you can reach the back of the chair with your hands.
Execution: Press your feet into the floor and lift your hips up, reaching your hands towards the back of the chair for support. Keep your shoulders and feet grounded and engage your glutes and hamstrings. Hold the pose for 20 to 30 seconds, then lower your hips back down. The chair helps to provide additional support and stability, allowing you to focus on opening your chest and hips in this backbend pose.
Safety Precautions and Tips
Choose the Right Chair
Select a chair that is stable, sturdy, and the right height for you. Avoid chairs with wheels or those that are wobbly. A chair with a wide seat and a backrest can provide additional support and comfort.
Listen to Your Body
Pay attention to any discomfort or pain during the practice. If a pose feels too difficult or causes pain, stop and modify the pose or skip it altogether. It’s important to work within your limits and not push yourself too hard.
Warm-Up and Cool-Down
Just like in traditional yoga, it’s essential to warm up before starting the chair-assisted practice and cool down afterwards. A simple warm-up can include gentle neck rolls, shoulder shrugs, and ankle rotations. The cool-down can consist of seated forward folds and deep breathing exercises.
Conclusion
Chair-assisted yoga offers a wealth of opportunities for individuals to experience the benefits of yoga, regardless of their physical abilities or limitations. By incorporating these chair-assisted poses into your practice, you can improve your strength, flexibility, balance, and overall well-being. Whether you are recovering from an injury, dealing with limited mobility, or simply looking for a new and accessible way to practice yoga, the chair can be a valuable tool in your yoga journey. So, grab a chair and start exploring the world of chair-assisted yoga poses, and discover the transformative power of this gentle and supportive practice.
Related topics


