Yoga is a holistic practice that aims to integrate the mind, body, and spirit through various physical postures (asanas), breathing techniques (pranayama), and meditation. Each yoga pose has its unique set of benefits, and understanding these poses is essential for practicing yoga effectively and mindfully. Among the various poses, the Dolphin Pose (Ardha Pincha Mayurasana) stands out for its strength-building qualities and versatility. Whether you’re a beginner or an experienced practitioner, the Dolphin Pose is a fantastic way to improve your flexibility, strength, and overall body awareness.
In this article, we will explore the Dolphin Pose in detail, including its proper alignment, benefits, variations, and common mistakes to avoid. By the end of this article, you’ll have a comprehensive understanding of this pose and how to incorporate it into your practice.
1. What is the Dolphin Pose?
The Dolphin Pose, or Ardha Pincha Mayurasana in Sanskrit, translates to “Half Peacock Feather Pose.” The word “Ardha” means “half,” “Pincha” means “feather,” and “Mayura” means “peacock,” referring to the position’s resemblance to a peacock’s tail feathers. The pose is similar to the Downward-Facing Dog Pose (Adho Mukha Svanasana), but it places more emphasis on the forearms instead of the hands, making it a challenging and beneficial pose for the upper body, especially the shoulders, arms, and core.
2. How to Practice Dolphin Pose: A Step-by-Step Guide
To practice the Dolphin Pose correctly, you need to focus on engaging your core muscles, grounding through your forearms, and lengthening your spine. Here’s a step-by-step guide to performing the Dolphin Pose:
Step 1: Begin on all fours
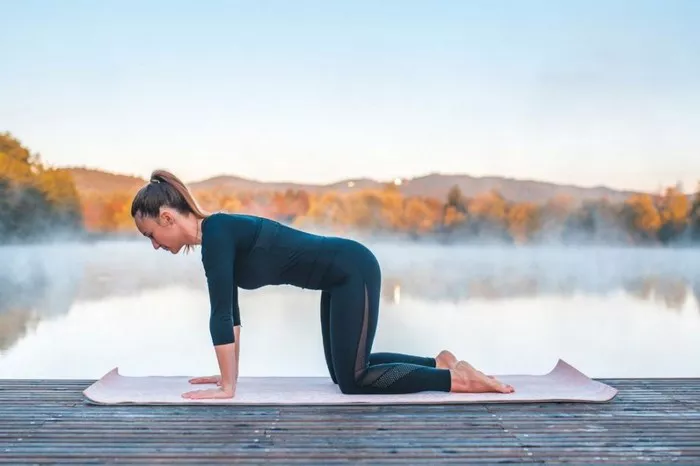
Start in a tabletop position with your knees stacked directly beneath your hips and your wrists directly under your shoulders. Your fingers should be spread wide for stability.
Step 2: Lower to your forearms
Carefully lower your forearms to the mat, one arm at a time, ensuring that your elbows are directly beneath your shoulders. Your forearms should be parallel to one another, with your palms facing down and your fingers spread.
Step 3: Lift your hips
Press into your forearms and lift your hips toward the ceiling, aiming to form an inverted “V” shape with your body. As you lift your hips, keep your legs straight and engage your thighs. Your feet should be hip-width apart.
Step 4: Position your head
Keep your head between your upper arms, but do not allow it to touch the ground. Your gaze should be directed toward your knees or your navel, depending on your flexibility.
Step 5: Engage your core
Activate your abdominal muscles to support your spine and prevent sagging in the lower back. Engage the inner thighs and lift your pelvic floor to help stabilize your body.
Step 6: Hold the pose
Stay in the Dolphin Pose for 20 to 30 seconds, or longer if you feel comfortable. Focus on your breath, taking slow and deep inhalations and exhalations, and maintaining steady engagement in your muscles.
Step 7: Exit the pose
To exit, slowly lower your knees back to the floor, coming back into a tabletop position. Take a few breaths and relax.
3. Benefits of the Dolphin Pose
The Dolphin Pose offers numerous benefits for both the body and mind. Here are some of the key advantages of incorporating this asana into your practice:
Strengthens the Upper Body
One of the primary benefits of the Dolphin Pose is that it strengthens the shoulders, arms, and upper back. The position requires you to bear weight on your forearms, which helps to develop strength in the shoulders and upper arms, making it an excellent pose for building upper body endurance.
Improves Core Stability
The Dolphin Pose engages the abdominal muscles, including the deep core muscles, to support the spine and maintain stability. This strengthens the core and improves overall posture, balance, and body awareness.
Stretches the Hamstrings and Spine
While the Dolphin Pose emphasizes strengthening the upper body, it also stretches the hamstrings and the spine. As you lift your hips and lengthen your spine, you create space between the vertebrae and stretch the muscles along your back, particularly the hamstrings. This helps to improve flexibility and alleviate tension in the lower back and legs.
Enhances Balance and Coordination
Holding the Dolphin Pose requires focus and coordination between your arms, core, and legs. It challenges your balance and proprioception (body awareness), making it a great pose for enhancing coordination and stability.
Improves Posture
As you practice the Dolphin Pose, you engage your core and activate the muscles along your back. This strengthens the muscles responsible for maintaining an upright posture, which can help improve overall posture in daily life.
Relieves Tension
The Dolphin Pose can also be an effective way to relieve tension in the neck, shoulders, and back. If you spend long hours sitting at a desk or working at a computer, practicing this pose can help release tightness and promote relaxation.
Calms the Mind
Like other yoga poses that require focus and breath awareness, the Dolphin Pose can help calm the mind and reduce stress. The concentration required to hold the pose allows you to be fully present, encouraging mindfulness and promoting a sense of peace.
4. Common Mistakes in Dolphin Pose and How to Avoid Them
To get the most benefit from the Dolphin Pose and prevent injury, it’s essential to practice it with proper alignment. Here are some common mistakes to avoid and tips for correcting them:
Elbows Too Far Apart
If your elbows are too wide apart, it can create strain on your shoulders and reduce the effectiveness of the pose. Make sure your elbows are directly beneath your shoulders and your forearms are parallel to each other.
Collapsing the Chest
A common mistake is collapsing the chest toward the floor, which can lead to a rounded upper back. Instead, focus on lifting the chest away from the floor and lengthening the spine. Imagine pulling your chest forward while lifting your hips up.
Holding the Head Tightly
While in the Dolphin Pose, it’s important not to strain the neck by holding the head tightly or dropping it toward the ground. Keep your head relaxed between your upper arms, with the neck aligned with the spine.
Not Engaging the Core
Engaging the core is crucial for maintaining stability and protecting your lower back. Avoid letting your lower back sag by drawing your navel toward your spine and lifting your pelvic floor to engage your core muscles.
Not Pressing Through the Forearms
In the Dolphin Pose, your forearms are responsible for supporting your body weight. If you don’t press evenly through the forearms, you might create unnecessary strain in the shoulders and wrists. Press down firmly into the floor with your forearms, keeping your elbows steady and grounded.
Bending the Knees
While the Dolphin Pose requires a slight bend in the knees to lift the hips, the goal is to eventually straighten the legs. Avoid excessive bending of the knees, as it can reduce the stretch in the hamstrings and limit the benefits of the pose.
5. Variations of the Dolphin Pose
To accommodate different levels of flexibility and strength, several variations of the Dolphin Pose can be incorporated into your practice:
Dolphin Pose with Leg Lift
In this variation, lift one leg off the ground while keeping your hips high and your body in the same “V” shape. This adds an extra challenge to the pose, engaging the core and glutes even more. Hold for a few breaths, then switch legs.
Dolphin Plank Pose
In the Dolphin Plank Pose, maintain the forearm positioning of the Dolphin Pose but straighten the legs and hold the body in a straight line, similar to a plank. This variation significantly strengthens the core and shoulders.
Dolphin Pose with Forearm Balance
For advanced practitioners, Dolphin Pose can be modified into a forearm balance or Pincha Mayurasana (Peacock Feather Pose). This version requires you to balance on your forearms with your legs extended upward. It builds incredible shoulder and core strength.
6. Contraindications and Precautions
While the Dolphin Pose is generally safe for most people, there are some precautions to keep in mind:
Wrist or Shoulder Injuries: If you have wrist or shoulder injuries, practice caution when performing the Dolphin Pose. Use props like a wedge or bolster to help support your forearms and reduce strain.
Neck Injuries: If you have neck issues, avoid letting your head hang too low or drop toward the ground. Keep the neck in a neutral position to protect it from further strain.
Pregnancy: Pregnant individuals should avoid putting too much pressure on the abdomen. If you’re pregnant, consult with a qualified yoga instructor to modify the pose accordingly.
Conclusion
The Dolphin Pose is an excellent yoga posture that offers numerous benefits for both the body and the mind. It strengthens the shoulders, arms, and core while providing a deep stretch to the hamstrings and spine. Practicing the Dolphin Pose regularly can improve your posture, balance, and flexibility, while also helping to release tension and calm the mind.
By focusing on proper alignment and engagement, you can safely incorporate the Dolphin Pose into your practice, regardless of your level of experience. Whether you use it as a warm-up, a strengthening exercise, or a way to connect more deeply with your breath, the Dolphin Pose is a versatile and effective tool for enhancing your overall yoga practice.
If you are new to yoga or have any concerns about your ability to perform this pose, always consider consulting with a professional yoga instructor to guide you through the correct technique and modifications based on your unique body. With practice, patience, and mindfulness, the Dolphin Pose can become a valuable addition to your yoga journey.
Related Topics:


