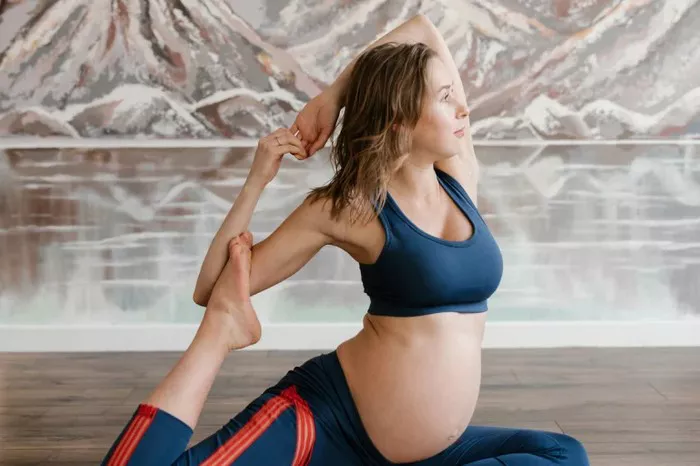
Downward Dog, or Adho Mukha Svanasana in Sanskrit, is one of the most recognized and widely practiced yoga poses. Despite its popularity, it can be intimidating for beginners who may not be familiar with its nuances or may struggle with its execution. This article aims to break down the pose for beginners, providing clear and comprehensive guidance on how to perform Downward Dog correctly, its benefits, common mistakes, and modifications to make it more accessible.
What is Downward Dog?
Downward Dog is an inverted V-shaped pose in which the hands and feet are pressed into the mat, while the hips are lifted toward the sky. It is often used as a transitional pose in many yoga flows, such as in the Surya Namaskar (Sun Salutation). The pose simultaneously stretches and strengthens various parts of the body, including the arms, shoulders, legs, and back. It also helps promote balance, flexibility, and coordination, making it an excellent foundational pose for beginners.
The Benefits of Downward Dog
Before learning how to do Downward Dog, it’s essential to understand its benefits. This will not only motivate you to practice but also help you stay mindful of the effects the pose has on your body.
Full-body Stretch: Downward Dog stretches the entire body, particularly the hamstrings, calves, and spine. By lengthening these muscles, the pose helps release tension and improve flexibility.
Strengthens the Arms and Shoulders: Holding the pose requires strength in the arms, shoulders, and core. Over time, practicing Downward Dog can help build muscle tone and endurance in these areas.
Improves Posture: This pose strengthens the back and opens the chest, which contributes to better posture, especially if you spend a lot of time sitting.
Promotes Circulation: By reversing the body’s orientation, Downward Dog stimulates blood flow to the brain, which can reduce stress, increase mental clarity, and provide a sense of calm.
Relieves Tension: The pose helps relieve tension in the neck, back, and spine, areas where many people commonly hold stress.
Energizes the Body: Downward Dog helps awaken the body, giving a natural energy boost. It’s a great pose to do in the morning to start the day off with vitality.
Improves Flexibility: With consistent practice, Downward Dog helps increase flexibility in the hamstrings, calves, and spine.
How to Perform Downward Dog Step-by-Step
To perform Downward Dog safely and effectively, follow these step-by-step instructions. Keep in mind that yoga is not about achieving the “perfect” pose. Focus on your body’s capabilities and gradually work toward your full expression of the pose.
1. Start in a Tabletop Position
Begin on your hands and knees in a neutral tabletop position. Your wrists should be directly under your shoulders, and your knees should be aligned with your hips. Spread your fingers wide apart, grounding the palms into the floor, and keep your arms straight but not locked. Your toes should be tucked under, and your feet should be hip-width apart.
2. Lift the Hips Toward the Ceiling
On an inhale, begin to lift your hips toward the ceiling. Imagine you are creating an inverted “V” shape with your body. To initiate the movement, press through your hands and feet while drawing your hips upward and back.
3. Straighten the Legs
As your hips rise, begin to straighten your legs. Don’t worry if your heels don’t touch the ground immediately. The key here is to keep the legs engaged, and feel the stretch in your hamstrings and calves. If your hamstrings are tight, bend your knees slightly to maintain a long spine.
4. Lengthen the Spine
As your hips lift, focus on lengthening your spine. Draw your chest toward your thighs and your tailbone toward the sky. This action should create a straight line from the wrists to the hips, and from the hips to the heels.
5. Align the Head and Neck
Relax your head between your arms, allowing your neck to remain in a neutral position. Do not let your head dangle; rather, keep it aligned with your spine. Gaze can either be directed towards your legs or toward your belly button.
6. Press Through the Hands and Feet
Press firmly through your palms and the balls of your feet. The hands should be actively pressing into the mat to provide stability. Engage your core muscles to protect your lower back and maintain balance.
7. Hold the Pose
Hold the position for several breaths. Inhale deeply through the nose, expanding the chest and ribcage, and exhale to deepen the stretch. Beginners may find it difficult to hold the pose for long periods, but with regular practice, this will improve.
8. Coming Out of the Pose
To exit the pose, gently bend your knees and lower your hips back to the tabletop position. Take a few breaths before moving to your next pose.
Common Mistakes to Avoid
While practicing Downward Dog, there are a few common mistakes to watch out for. Avoiding these errors will ensure that you’re practicing the pose safely and effectively:
Collapsed Hands: Avoid collapsing your hands into the mat. Instead, press your palms evenly and actively into the floor. This will engage your arms and prevent strain on the wrists.
Arched Back: A common mistake is allowing the back to sag or collapse. This can place unnecessary pressure on the lower back. To correct this, engage your core muscles and work to lengthen the spine.
Hyperextended Elbows: Be mindful of your elbows, making sure they’re not locked in a hyperextended position. Keep a slight bend in the elbows to maintain a soft, natural alignment.
Bending the Knees Too Much: While it’s perfectly fine to bend your knees slightly, avoid over-bending them. Doing so can reduce the stretch in your hamstrings and calves.
Tension in the Neck: Ensure that your neck stays relaxed, and that the head isn’t dangling or too tense. The gaze should be directed in a way that promotes comfort and proper alignment.
Modifications for Beginners
If you’re new to yoga or struggle with the full expression of Downward Dog, consider these modifications:
Knee Support: If your hamstrings are tight, you can keep your knees bent to reduce strain. Over time, you can gradually work toward straightening your legs as flexibility improves.
Block Under Hands: If you find it difficult to reach the floor with your hands, place yoga blocks under your hands for extra height. This will create more space and alleviate any discomfort in the wrists or shoulders.
Use a Wall: To practice Downward Dog with better alignment, consider doing the pose with your hands on a wall. Stand a few feet away from the wall, place your palms on it, and then lift your hips up and back. This modification helps you develop body awareness and can be less strenuous than practicing on the floor.
Props for Flexibility: If you have tight hamstrings or calves, use props like a strap around your feet to help maintain the stretch without forcing the pose.
Child’s Pose for Rest: If at any point you feel overwhelmed or fatigued, take a break by coming into Child’s Pose (Balasana), which is a gentle resting pose.
Frequently Asked Questions
How long should I hold Downward Dog? As a beginner, hold Downward Dog for 15 to 30 seconds. Over time, you can gradually increase the duration as your strength and flexibility improve.
Is Downward Dog safe for everyone? Downward Dog is generally safe for most people, but if you have a wrist injury, shoulder issues, or lower back pain, you should consult with your healthcare provider before attempting this pose. Modifications may be necessary.
Can I practice Downward Dog every day? Yes, practicing Downward Dog daily can be beneficial for improving flexibility and strength. However, listen to your body. If you feel pain or discomfort, take a break or reduce the frequency of your practice.
Why is my back still rounded in Downward Dog? A rounded back is common when you’re starting. Focus on engaging your core muscles, pressing through the hands, and lengthening the spine. Practice and patience will help correct this over time.
Conclusion
Downward Dog is a cornerstone pose in yoga that offers numerous physical and mental benefits. By breaking it down into manageable steps and incorporating modifications where needed, beginners can develop the strength, flexibility, and confidence required to perform the pose correctly. Regular practice will improve posture, relieve tension, and provide a sense of calm and focus. Keep in mind that yoga is a journey, and each practice is an opportunity to connect with your body and mind. So, take it one breath at a time, and enjoy the process.
Related topics