Dancer Pose, or Natarajasana, is one of the most elegant and challenging postures in yoga, named after the Hindu god Shiva, also known as Nataraja, the Lord of Dance. This dynamic and graceful pose involves balance, flexibility, strength, and focus, making it a fantastic addition to any yoga practice. Whether you’re a seasoned yogi or just starting your journey, this guide will take you step by step through the process of performing Dancer Pose, while also offering tips on how to build strength, flexibility, and mindfulness along the way.
In this article, we will break down the alignment, step-by-step instructions, benefits, modifications, and safety tips that will help you master this stunning pose.
What is Dancer Pose (Natarajasana)?
Natarajasana is a standing balancing pose that stretches the front of the body, improves stability and focus, and strengthens the legs and core. It is often regarded as a heart-opening posture that can also improve flexibility in the hips, quadriceps, and chest. This pose combines a backbend and balance, which challenges both physical and mental endurance. As you perform the pose, you imitate the grace and flow of a dancer, with your chest and arms lifting as you bend backward while holding one leg behind you.
The pose provides a harmonious blend of strength and flexibility, making it an essential pose in any yoga practice. It is particularly beneficial for athletes, dancers, and individuals seeking to enhance their balance and posture.
Benefits of Dancer Pose (Natarajasana)
Before we dive into the specifics of performing Dancer Pose, let’s review some of the key benefits you can expect from this posture:
Increased Balance and Coordination: As a balancing pose, Natarajasana improves your overall sense of balance, stability, and coordination. It challenges your body’s ability to stay centered on one leg while engaging the core and legs for support.
Improved Flexibility: The posture stretches the hip flexors, quadriceps, chest, and shoulders. It also helps to open up the hip joint, improving flexibility in the lower body and encouraging a deep release in the hips.
Strengthens Legs and Core: Holding Natarajasana requires significant strength from your standing leg, as well as your core muscles. This builds muscle tone and stability in the legs, core, and glutes.
Opens the Chest and Shoulders: As you lift your chest and extend your arms, the pose naturally opens the chest and shoulders, releasing tension from the upper body and improving posture.
Mental Focus and Mindfulness: Since Natarajasana is a balancing posture, it requires concentration and mental clarity. By focusing on the present moment and maintaining your balance, you cultivate mindfulness, which can also reduce stress and anxiety.
Increases Circulation: The backbend and the dynamic movement in the pose help to stimulate circulation throughout the body, particularly in the lower back, legs, and hips.
Preparing for Dancer Pose
Dancer Pose demands flexibility, strength, and balance, so it’s important to prepare your body before attempting it. A thorough warm-up focusing on hip flexors, quadriceps, hamstrings, and shoulders is key to performing this posture safely and effectively.
Here are some preparatory poses to include in your warm-up:
Mountain Pose (Tadasana) – Focus on grounding through your feet and lengthening your spine. This helps with alignment and balance.
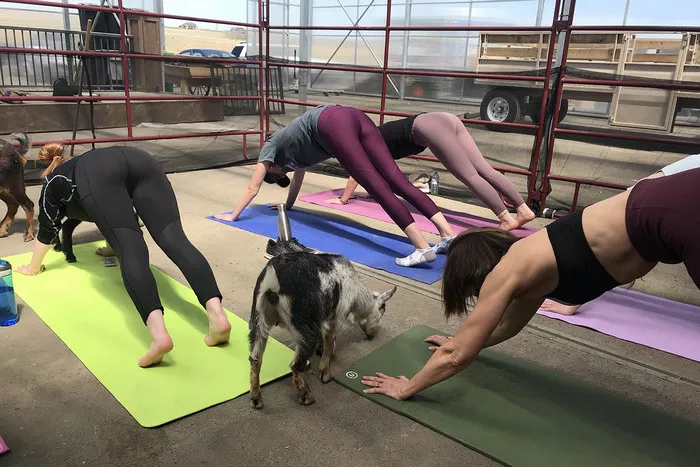
Downward-Facing Dog (Adho Mukha Svanasana) – A great way to warm up the entire body, especially the shoulders, hamstrings, and calves.
Warrior II (Virabhadrasana II) – Strengthens the legs and builds awareness in the hips and core.
Camel Pose (Ustrasana) – Opens the chest and improves spinal flexibility, making it easier to perform the backbend component of Dancer Pose.
Quad Stretch – Perform a standing quadriceps stretch to increase flexibility in the hip flexors and quadriceps.
Step-by-Step Instructions for Dancer Pose
Now that you’re warmed up, it’s time to move into Dancer Pose. Follow these steps for a safe and effective practice:
1. Start in Mountain Pose (Tadasana)
Begin by standing tall with your feet hip-width apart. Ground your feet into the floor, lift your chest, and engage your core. Take a few deep breaths to center yourself and focus your attention.
2. Find Your Balance
Shift your weight onto your left foot. Keep your left leg straight and strong, engaging the quadriceps and pressing through the foot. Take a moment to establish your balance before moving into the next steps. It’s important to feel stable before attempting the stretch.
3. Grab Your Right Foot
Bend your right knee and bring your right foot toward your glutes. Reach your right hand behind you to grasp the inside of your right foot or ankle. Ensure that your grip is firm but relaxed, allowing your body to move naturally. Keep your hips square and avoid letting your right knee drift out to the side.
4. Kick Your Foot Back
Start to kick your right foot back gently, as you lift your chest and elongate your spine. The action of kicking your foot back will create a natural backbend in your body. As you continue to kick back, keep your standing leg strong and stable, and avoid collapsing your chest forward.
5. Extend Your Left Arm Forward
As your foot continues to lift, extend your left arm straight in front of you, parallel to the floor. Keep your arm active, reaching forward through your fingertips, while maintaining an open chest. This helps to counterbalance the backbend and creates a sense of extension throughout your body.
6. Continue to Lift and Open
Once you have your foot kicked back and your chest lifted, try to deepen the backbend slightly by lifting your chest more and keeping the length in your spine. Be mindful not to compress your lower back; instead, engage your core to maintain length through the torso.
7. Hold and Breathe
Hold the pose for 5–10 breaths, depending on your comfort level. Focus on maintaining your balance and breathing deeply, allowing the body to open more with each exhale. Try not to strain or force the posture; instead, focus on the grace and fluidity of the movement.
8. Come Out of the Pose
To release the pose, slowly lower your right foot to the ground and bring your arms back to your sides. Take a few breaths in Mountain Pose to center yourself before repeating the pose on the other side.
Tips for Beginners
Focus on Your Balance: Balancing poses like Dancer Pose can be tricky, so it’s important to find a focal point in front of you to help maintain stability. Keep your gaze steady and focus on your breathing.
Engage Your Core: Engaging your core will help protect your lower back and provide support as you perform the backbend and balance. A strong core is essential for maintaining stability in the pose.
Avoid Hyperextension: While it’s important to kick your foot back, avoid overextending or forcing the leg too far. Let the backbend and kick come naturally, and don’t try to force your body into a deeper stretch than it’s ready for.
Use Props: If balance is challenging, practice the pose near a wall for support. You can also use a yoga block under your hands to help with balance and alignment.
Take Your Time: Don’t rush through the pose. Focus on quality over quantity, holding the pose for shorter durations as you build strength and flexibility.
Modifications and Variations
If you’re struggling with balance or flexibility, here are some modifications to make Dancer Pose more accessible:
Wall Support: Stand with your back to a wall, and place one hand lightly on the wall for extra balance while you practice. This allows you to focus more on the stretch and less on the stability.
Use a Strap: If you can’t reach your foot, use a yoga strap around the arch of your foot to help you maintain the stretch. This allows you to still perform the pose and work on flexibility without overexerting.
Gentler Backbend: If your spine or shoulders are tight, opt for a gentler backbend by not kicking the leg as far back and maintaining a neutral spine.
Practice with Blocks: If your standing leg is not fully extended, you can place yoga blocks under your hands to create more space for your body to extend and find balance.
Common Mistakes to Avoid
Collapsing the Chest: It’s easy to let the chest collapse forward in an attempt to deepen the backbend. Keep your chest lifted and open, and avoid rounding your upper back.
Hyperextending the Knee: Be mindful of your standing leg and avoid locking the knee. Keep a soft bend in the standing leg to protect the joint.
Forcing the Backbend: Instead of forcing your body into a deep backbend, listen to your body and allow the movement to come gradually. Only go as far as feels comfortable and sustainable.
Conclusion
Dancer Pose is a powerful and graceful asana that provides numerous benefits, from improved balance and flexibility to enhanced mental clarity. While it can be challenging for beginners, with consistent practice and attention to proper alignment, you can gradually develop the strength and flexibility needed to perform this beautiful pose. Whether you’re working on your balance or enhancing your body’s flexibility and strength, Dancer Pose is a wonderful addition to any yoga practice.
As with any yoga pose, remember to be patient with yourself and focus on progress, not perfection. By incorporating the tips and techniques outlined in this guide, you’ll find your way into this elegant pose and enjoy the physical and mental benefits it offers.
Related Topics: