Restorative yoga is a gentle, soothing practice designed to help practitioners relax deeply and restore balance in their bodies and minds. Unlike more vigorous forms of yoga, restorative yoga focuses on relaxation, stillness, and the use of props to support the body in restful postures. Sequencing a restorative yoga class requires a thoughtful approach to ensure that participants can achieve the maximum benefits of relaxation and rejuvenation. In this article, we will explore how to sequence a restorative yoga class, including key principles, essential poses, and tips for creating a nurturing and calming environment.
Understanding Restorative Yoga
Before diving into the specifics of sequencing a restorative yoga class, it’s important to understand the core principles of restorative yoga. This practice is characterized by:
- Long Holds: Poses are typically held for 5-20 minutes to allow the body and mind to fully relax.
- Use of Props: Props such as bolsters, blankets, blocks, and straps are used to support the body, reducing strain and allowing for complete relaxation.
- Focus on Relaxation: The goal is to calm the nervous system and promote deep relaxation, which can help reduce stress, improve sleep, and enhance overall well-being.
- Minimal Movement: Unlike more dynamic forms of yoga, restorative yoga involves minimal movement, with a focus on stillness and gentle transitions between poses.
Key Elements of a Restorative Yoga Sequence
When sequencing a restorative yoga class, consider the following key elements to create a balanced and effective practice:
1. Setting the Tone
Begin by creating a serene and inviting environment. This can include:
- Dim Lighting: Soft, dim lighting helps to create a calming atmosphere.
- Soft Music or Silence: Gentle, soothing music or complete silence can enhance relaxation.
- Comfortable Temperature: Ensure the room is comfortably warm, as a cool environment can make it difficult to relax.
- Aromatherapy: Essential oils such as lavender or chamomile can promote relaxation.
2. Opening the Class
Start the class with a grounding practice to help participants transition from their daily activities to a state of relaxation. This can include:
- Breath Awareness: Encourage students to focus on their breath, taking slow, deep inhales and exhales.
- Guided Meditation: A short guided meditation or body scan can help students tune into their bodies and minds.
3. Warm-Up Poses
Although restorative yoga is gentle, it’s beneficial to include a few gentle warm-up poses to prepare the body for deeper relaxation. These can include:
- Cat-Cow Stretch (Marjaryasana-Bitilasana): Gently moving the spine can help release tension.
- Seated Forward Bend (Paschimottanasana): A gentle forward fold can help calm the mind and stretch the back.
4. Core Restorative Poses
The heart of a restorative yoga class lies in the long-held restorative poses. Here are some essential poses to include:
See Also: Can We Do Pranayama Before Yoga?
1. Supported Child’s Pose (Balasana)
- Setup: Use a bolster or stack of blankets to support the torso. Knees can be wide or together.
- Benefits: Calms the mind, gently stretches the back, and promotes a sense of safety and comfort.
- Hold Time: 5-10 minutes.
2. Reclining Bound Angle Pose (Supta Baddha Konasana)
- Setup: Place a bolster along the spine for support. Use blocks or blankets under the knees for additional support.
- Benefits: Opens the chest and hips, promotes deep relaxation, and can help alleviate anxiety.
- Hold Time: 10-20 minutes.
3. Supported Bridge Pose (Setu Bandhasana)
- Setup: Place a bolster or block under the sacrum for support.
- Benefits: Opens the chest, stretches the front body, and gently stimulates the thyroid.
- Hold Time: 5-10 minutes.
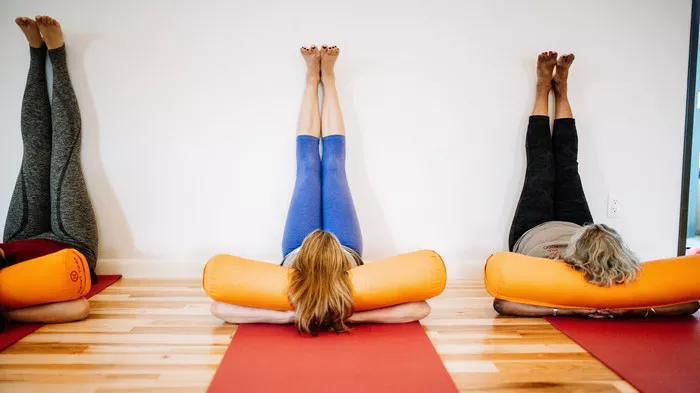
4. Legs-Up-The-Wall Pose (Viparita Karani)
- Setup: Lie with legs up the wall, using a bolster or blanket under the hips for support if desired.
- Benefits: Reverses blood flow, reduces swelling in the legs, and calms the nervous system.
- Hold Time: 10-15 minutes.
5. Supported Savasana (Corpse Pose)
- Setup: Use bolsters and blankets to support the head, neck, and knees for maximum comfort.
- Benefits: Deep relaxation, promotes healing, and integrates the benefits of the practice.
- Hold Time: 10-20 minutes.
5. Transitioning Between Poses
Transitions between poses should be slow and mindful to maintain a sense of calm and relaxation. Encourage students to move gently and with awareness. Here are some tips for smooth transitions:
- Cueing: Use clear and gentle cues to guide students into and out of poses.
- Breath Awareness: Encourage students to use their breath to facilitate movement, exhaling as they settle into a pose and inhaling as they prepare to move.
- Mindfulness: Remind students to move mindfully, paying attention to how their bodies feel and making any necessary adjustments to stay comfortable.
6. Closing the Class
End the class with a gentle closing practice to help students transition back to their day with a sense of calm and centeredness. This can include:
- Guided Relaxation: Lead a short guided relaxation or body scan to help students fully absorb the benefits of the practice.
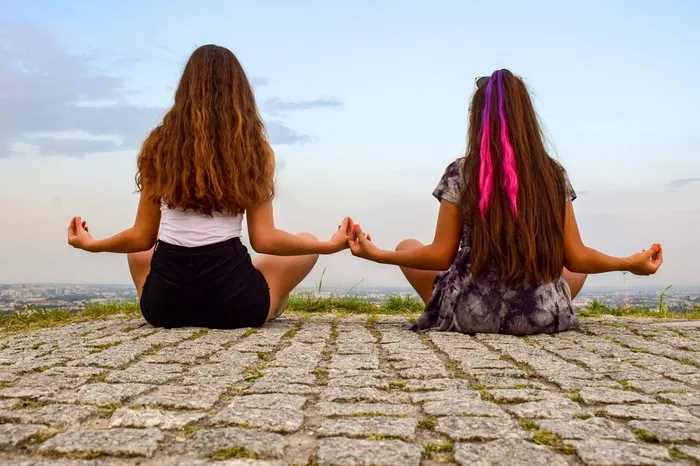
- Seated Meditation: Bring the class to a seated position for a few moments of silent meditation or breath awareness.
- Gratitude: Encourage students to take a moment to reflect on something they are grateful for, fostering a positive and peaceful mindset.
Sample Restorative Yoga Sequence
Here is a sample sequence for a 60-minute restorative yoga class:
Opening (5 minutes)
- Breath Awareness
- Short Guided Meditation
Warm-Up Poses (10 minutes)
- Cat-Cow Stretch (Marjaryasana-Bitilasana) – 5 minutes
- Seated Forward Bend (Paschimottanasana) – 5 minutes
Core Restorative Poses (40 minutes)
- Supported Child’s Pose (Balasana) – 5 minutes
- Reclining Bound Angle Pose (Supta Baddha Konasana) – 10 minutes
- Supported Bridge Pose (Setu Bandhasana) – 5 minutes
- Legs-Up-The-Wall Pose (Viparita Karani) – 10 minutes
- Supported Savasana (Corpse Pose) – 10 minutes
Closing (5 minutes)
- Guided Relaxation
- Seated Meditation
- Gratitude Reflection
Tips for Teaching Restorative Yoga
- Encourage the Use of Props: Ensure that all students have access to the necessary props and know how to use them to support their bodies in each pose.
- Emphasize Breath: Remind students to focus on their breath, using it as a tool to deepen relaxation.
- Create a Safe Space: Foster an environment where students feel safe to relax and let go. This includes maintaining a quiet and calm atmosphere.
- Offer Adjustments and Modifications: Provide gentle adjustments and modifications to help students find comfort in each pose.
- Be Mindful of Time: Keep track of time to ensure that poses are held long enough for students to experience their full benefits without feeling rushed.
Conclusion
Sequencing a restorative yoga class involves careful consideration of the environment, the selection of poses, and the overall flow of the practice. By focusing on creating a nurturing and calming atmosphere, incorporating key restorative poses, and guiding students with mindfulness and compassion, you can facilitate a deeply relaxing and rejuvenating experience for your students. Whether you are a seasoned yoga instructor or new to teaching restorative yoga, these guidelines can help you design a class that promotes healing, relaxation, and a sense of inner peace.
Related topics:

