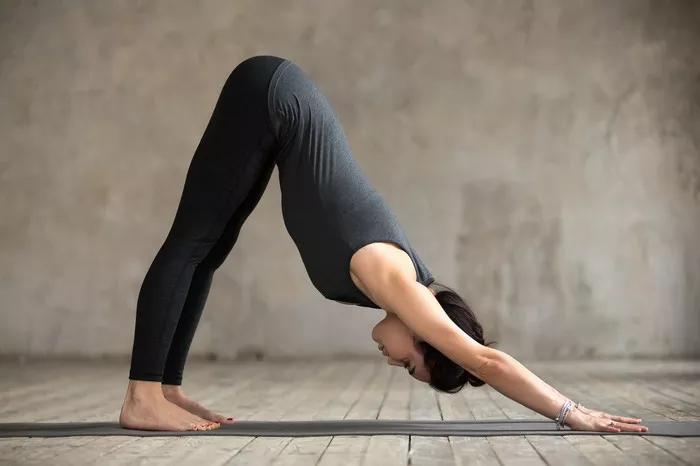
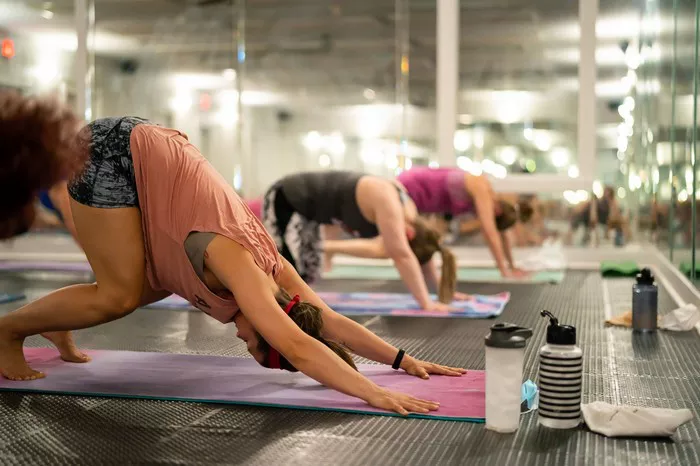
Downward Dog, or Adho Mukha Svanasana, is one of the foundational poses in yoga. It’s a powerful posture that offers a multitude of benefits for both the body and mind. Despite its seemingly simple appearance, achieving proper alignment and technique in Downward Dog requires attention to detail and consistent practice. In this comprehensive guide, we’ll delve into the intricacies of the pose, offering step-by-step instructions, variations, alignment tips, common mistakes to avoid, and modifications for practitioners of all levels.
Understanding the Basics
Before diving into the specifics of how to perform Downward Dog, it’s essential to understand its basic components. This pose is typically practiced as part of a Sun Salutation sequence or as a standalone posture. Downward Dog primarily targets the back body, including the hamstrings, calves, shoulders, and spine. It also engages the core muscles, promoting strength and stability throughout the body.
Step-by-Step Guide
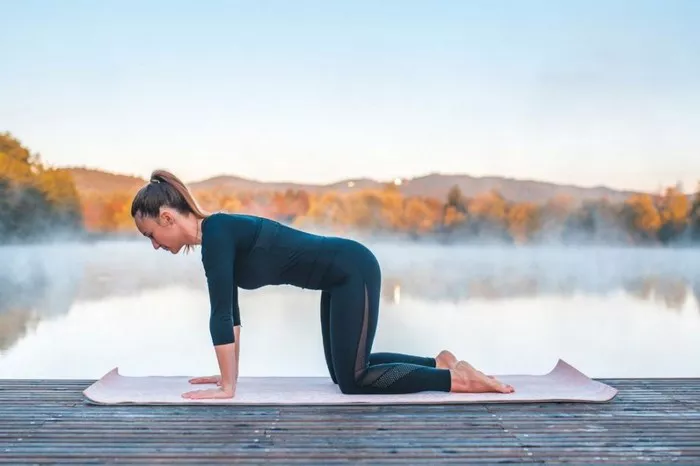
1. Starting Position: Begin on your hands and knees in a tabletop position, with your wrists aligned under your shoulders and your knees under your hips. Spread your fingers wide, distributing the weight evenly through your palms.
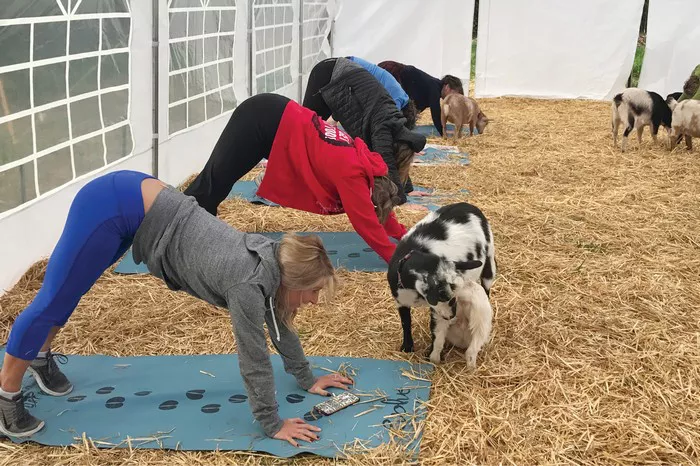
2. Transition: Exhale as you lift your hips toward the ceiling, straightening your arms and legs to form an inverted V shape. Press firmly into your hands and feet to lift your hips as high as comfortably possible.
3. Alignment: Ensure that your arms are shoulder-width apart and parallel to each other, with your fingers spread wide and pointing forward. Keep your feet hip-width apart, with your heels reaching toward the floor. Engage your quadriceps to straighten your legs while maintaining a slight bend in the knees to prevent hyperextension.
4. Lengthening the Spine: Lengthen your spine by reaching your tailbone toward the ceiling and drawing your chest toward your thighs. Keep your neck in line with your spine, allowing your head to hang freely between your arms. Gaze toward your navel or slightly between your legs to maintain a neutral neck position.
5. Deepening the Stretch: If you feel comfortable, you can intensify the stretch by pressing your heels closer to the floor and lifting your sit bones higher. Focus on maintaining length through the entire length of your spine while keeping your shoulders relaxed away from your ears.
6. Breathing: Take slow, deep breaths as you hold the pose, allowing your breath to guide your movements. Inhale deeply through your nose, expanding your ribcage, and exhale fully through your mouth, releasing any tension in the body.
7. Duration: Hold the pose for 5-10 breaths, gradually increasing the duration as your strength and flexibility improve. Remember to listen to your body and come out of the pose if you experience any discomfort or strain.
Variations and Modifications
While Downward Dog is accessible to practitioners of all levels, there are several variations and modifications that can accommodate individual needs and preferences:
1. Bent-Knee Downward Dog: If you have tight hamstrings or limited flexibility, you can practice Downward Dog with a slight bend in the knees. This variation allows you to focus on lengthening the spine and opening the shoulders without straining the legs.
2. Using Props: Place a yoga block under each hand to elevate the floor, providing additional support and stability. This modification is particularly beneficial for beginners or those with wrist issues.
3. Wall-Assisted Downward Dog: Stand facing a wall and place your hands shoulder-width apart at shoulder height. Step back a few feet and press your palms into the wall as you walk your feet back, coming into Downward Dog with your torso parallel to the floor. This variation allows you to focus on alignment and proper engagement of the muscles.
4. One-Legged Downward Dog: From the traditional Downward Dog position, inhale as you lift one leg toward the ceiling, keeping your hips square. Extend through the heel and engage the muscles of the lifted leg while maintaining stability in the supporting leg. Hold for a few breaths before returning to the starting position and repeating on the opposite side.
5. Child’s Pose: If Downward Dog feels too intense or uncomfortable, you can release into Child’s Pose to rest and restore. Kneel on the mat with your big toes together and knees hip-width apart, then lower your torso toward the floor, extending your arms in front of you or resting them by your sides. Take deep breaths into the back body, allowing your muscles to relax and release tension.
Common Mistakes to Avoid
1. Rounded Back: Avoid rounding the spine by focusing on lengthening through the crown of the head and reaching the tailbone toward the ceiling. Keep the abdomen engaged to support the lower back and prevent overarching.
2. Collapsed Shoulders: Maintain active engagement in the shoulders by pressing firmly into the hands and externally rotating the upper arms. Avoid sinking into the shoulders by drawing the shoulder blades down the back and broadening across the collarbones.
3. Locked Elbows: While it’s essential to straighten the arms, avoid hyperextending the elbows, which can strain the joints and cause discomfort. Keep a micro-bend in the elbows to distribute the weight evenly and protect the elbows from injury.
4. Tense Neck: Keep the neck relaxed and in line with the spine, avoiding any unnecessary tension or strain. Gaze softly toward your navel or between your legs to maintain a neutral neck position and promote relaxation in the upper body.
5. Overarching the Lower Back: Be mindful of the pelvis position to prevent overarching or excessive curvature in the lower back. Engage the core muscles and draw the navel toward the spine to support the lumbar spine and maintain a neutral pelvis.
Incorporating Downward Dog Into Your Practice
Downward Dog is a versatile pose that can be incorporated into various yoga sequences and practices:
1. Warm-Up: Use Downward Dog as a dynamic warm-up to prepare the body for more challenging poses. Flow through several rounds of Sun Salutations, linking movement with breath to build heat and increase circulation.
2. Strength Building: Hold Downward Dog for an extended duration to build strength and endurance in the arms, shoulders, and core muscles. Focus on engaging the muscles of the body while maintaining steady breath and awareness.
3. Cool Down: Wind down your practice by returning to Downward Dog to release tension in the muscles and promote relaxation. Use props such as blocks or straps to support the body and deepen the stretch if desired.
4. Transitional Pose: Use Downward Dog as a transitional pose between sequences or as a resting position during a vigorous practice. Take a few breaths in the pose to regroup and refocus before moving on to the next posture.
Conclusion
Downward Dog is a fundamental pose that offers numerous physical, mental, and energetic benefits. By practicing this pose with awareness and intention, you can improve flexibility, strength, and alignment while calming the mind and reducing stress. Whether you’re a beginner or an experienced yogi, incorporating Downward Dog into your regular practice can enhance your overall well-being and deepen your connection to yourself and the present moment. Remember to approach the pose with patience, curiosity, and a willingness to explore your body’s unique capabilities. With time and consistent practice, you’ll discover the transformative power of this iconic yoga posture.

