Yoga is a practice that evolves with each practitioner, offering challenges and rewards that deepen over time. As you progress in your yoga journey, you may find yourself drawn to more complex poses that demand strength, flexibility, and mindfulness in equal measure. These poses not only test your physical abilities but also cultivate mental resilience and spiritual connection. In this guide, we will explore the top 10 complex yoga poses, providing detailed instructions on how to practice each one safely and effectively.
1. Sirsasana (Headstand)
Benefits: Headstand is often called the “king of all asanas” due to its numerous benefits, including improved circulation, concentration, and core strength.
How to Practice:
- Start on your hands and knees (Tabletop position).
- Interlace your fingers and place the crown of your head on the mat, creating a tripod with your hands.
- Lift your hips and walk your feet towards your face, keeping your knees bent.
- Slowly straighten your legs as you lift your hips higher, engaging your core.
- Balance with control, keeping your gaze steady and breathing deeply.
- To release, bend your knees and lower them towards your chest before gently lowering your feet to the mat.
Tips: Practice against a wall initially for support and avoid this pose if you have neck or back injuries.
2. Pincha Mayurasana (Forearm Stand)
Benefits: Forearm stand strengthens the upper body, improves balance, and builds confidence.
How to Practice:
- Begin in Dolphin pose: Forearms on the mat, fingers interlaced, and elbows shoulder-width apart.
- Walk your feet closer to your elbows, lifting your hips high.
- Slowly lift one leg towards the ceiling, engaging your core and pressing through your forearms.
- Once stable, lift your other leg to join the first, keeping your gaze between your forearms.
- Hold the pose with steady breaths, maintaining alignment from head to heels.
- To exit, lower one leg at a time back to Dolphin pose.
Tips: Practice near a wall for support and avoid if you have shoulder or wrist injuries.
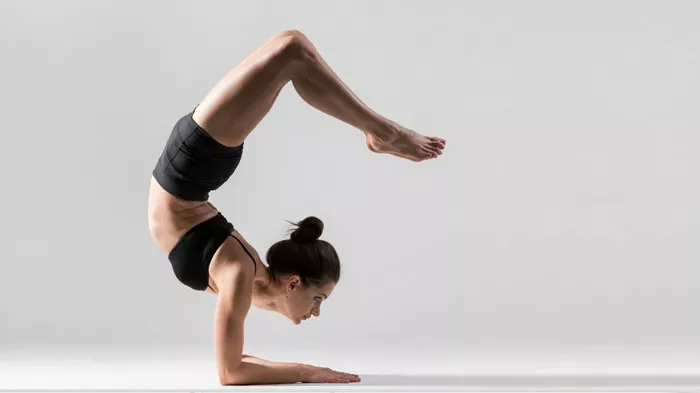
3. Vrschikasana (Scorpion Pose)
Benefits: Scorpion pose enhances back flexibility, strengthens the shoulders, and opens the chest.
How to Practice:
- Start in Forearm Stand (Pincha Mayurasana).
- Bend your knees and slowly lower your feet towards your head, aiming to touch your toes to the back of your head.
- Press through your forearms to lift your chest and extend your legs upwards.
- Maintain balance by engaging your core and lengthening through your spine.
- Hold the pose while breathing deeply, keeping your gaze steady.
- To release, gently lower your feet back to Forearm Stand position.
Tips: Practice with a spotter initially and avoid if you have neck or lower back issues.
4. Eka Pada Koundinyasana II (One-Legged Sage Koundinya’s Pose II)
Benefits: This arm balance pose strengthens the arms, wrists, and core muscles while improving balance and concentration.
How to Practice:
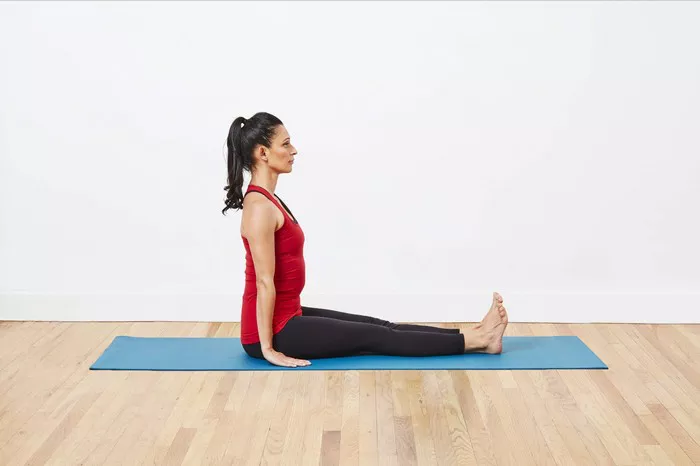
- Begin in a seated position with your legs extended.
- Bend your right knee and bring it close to your right shoulder.
- Plant your palms shoulder-width apart on the mat, fingers spread wide.
- Shift your weight forward, bending your elbows and lifting your hips.
- Engage your core and hook your right foot over your right upper arm.
- Extend your left leg straight out to the side.
- Hold the pose with steady breaths, focusing your gaze ahead.
- To exit, lower your legs and return to a seated position.
Tips: Build arm strength with plank variations and avoid if you have wrist or shoulder injuries.
5. Astavakrasana (Eight-Angle Pose)
Benefits: Eight-Angle Pose builds arm and core strength, enhances balance, and promotes concentration.
How to Practice:
- Start in a seated position with your legs extended.
- Bend your knees and place your hands on the mat beside your hips, fingers pointing forward.
- Shift your weight to your hands and lift your hips off the mat.
- Hook your right knee over your right upper arm, leaning forward slightly.
- Cross your left ankle over your right ankle.
- Engage your core and slowly straighten your arms, lifting your hips higher.
- Hold the pose with steady breaths, keeping your gaze forward.
- To release, gently lower your hips back to the mat and extend your legs.
Tips: Practice with blocks under your hands for support and avoid if you have wrist or shoulder injuries.
6. Mayurasana (Peacock Pose)
Benefits: Peacock Pose strengthens the wrists, forearms, and abdominal muscles, improves digestion, and enhances willpower.
How to Practice:
- Start in a kneeling position with your knees wide apart.
- Sit back on your heels and place your hands on the mat, fingers pointing towards your body.
- Lean forward, bending your elbows and placing them just below your navel.
- Straighten your legs behind you and lift your hips, balancing on your hands.
- Engage your core and extend your legs fully, pointing your toes.
- Hold the pose with steady breaths, keeping your gaze forward.
- To release, lower your legs back to the mat and sit back on your heels.
Tips: Practice wrist-strengthening exercises and avoid if you have wrist injuries or carpal tunnel syndrome.
7. Bakasana (Crow Pose)
Benefits: Crow Pose strengthens the arms, wrists, and core muscles, improves balance, and boosts concentration.
How to Practice:
- Begin in a squatting position with your feet close together and knees wide apart.
- Plant your palms shoulder-width apart on the mat, fingers spread wide.
- Lean forward, shifting your weight onto your hands and lifting your heels off the mat.
- Bend your elbows slightly, squeezing your knees against your upper arms.
- Engage your core and lift your feet off the mat, balancing on your hands.
- Hold the pose with steady breaths, keeping your gaze forward.
- To release, gently lower your feet back to the mat.
Tips: Use a folded blanket under your head for support and avoid if you have wrist injuries.
See Also: 9 Best Back-Bending Yoga Poses
8. Kasyapasana (Sage Kasyapa’s Pose)
Benefits: Sage Kasyapa’s Pose strengthens the arms, shoulders, and core muscles, improves balance, and cultivates patience.
How to Practice:
- Start in a seated position with your legs extended.
- Bend your right knee and bring it close to your right shoulder.
- Place your hands shoulder-width apart on the mat beside your hips, fingers pointing forward.
- Shift your weight onto your hands and lift your hips off the mat.
- Hook your right foot over your right upper arm, extending your left leg straight out to the side.
- Engage your core and slowly straighten your arms, lifting your hips higher.
- Hold the pose with steady breaths, focusing your gaze ahead.
- To release, gently lower your hips back to the mat and extend your legs.
Tips: Practice with a bolster under your hips for support and avoid if you have wrist or shoulder injuries.
9. Tittibhasana (Firefly Pose)
Benefits: Firefly Pose strengthens the arms, wrists, and core muscles, improves flexibility in the hips and hamstrings, and increases focus.
How to Practice:
- Start in a squatting position with your feet hip-width apart and knees bent.
- Place your palms shoulder-width apart on the mat between your feet, fingers pointing forward.
- Lean forward, shifting your weight onto your hands and lifting your hips.
- Bend your elbows slightly, squeezing your knees against your upper arms.
- Straighten your legs and extend them out to the sides, keeping them parallel to the mat.
- Engage your core and lift your feet off the mat, balancing on your hands.
- Hold the pose with steady breaths, keeping your gaze forward.
- To release, gently lower your feet back to the mat.
Tips: Practice hip-opening poses and hamstring stretches beforehand and avoid if you have wrist injuries.
10. Dwi Pada Viparita Dandasana (Two-Legged Inverted Staff Pose)
Benefits: Two-Legged Inverted Staff Pose strengthens the arms, shoulders, and core muscles, improves spinal flexibility, and invigorates the entire body.
How to Practice:
- Start lying on your back with your knees bent and feet flat on the mat.
- Bend your elbows and place your palms beside your ears, fingers pointing towards your shoulders.
- Press through your hands and feet to lift your hips off the mat into Wheel Pose (Urdhva Dhanurasana).
- Once in Wheel Pose, lift one leg towards the ceiling, keeping it straight.
- Engage your core and slowly lift your other leg to join the first, keeping your gaze forward.
- Hold the pose with steady breaths, lifting your hips higher and lengthening through your legs.
- To release, gently lower one leg at a time back to Wheel Pose and then lower your hips to the mat.
Tips: Practice Wheel Pose regularly to build strength and avoid if you have wrist or shoulder injuries.
Conclusion
Integrating complex yoga poses into your practice can be both challenging and deeply rewarding. These poses not only strengthen the body but also cultivate mental clarity, emotional balance, and spiritual awareness. Remember that yoga is a personal journey, and each practitioner’s experience will vary. Approach these poses with curiosity, respect, and a sense of adventure. With patience, perseverance, and proper guidance, you can expand your practice and discover new dimensions of strength and flexibility within yourself.
Related topics:

